Blogs: Construction

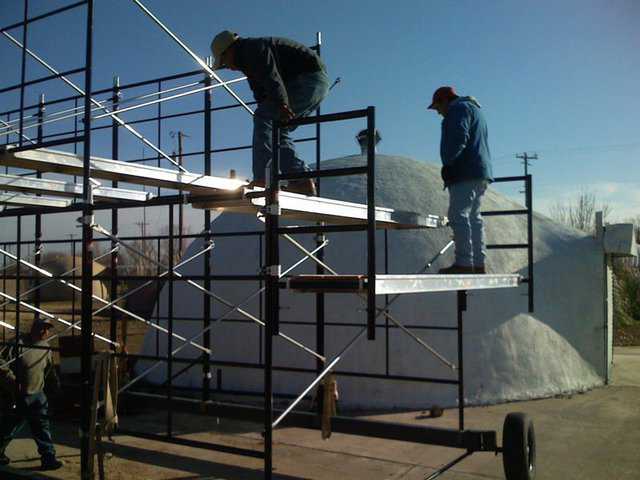
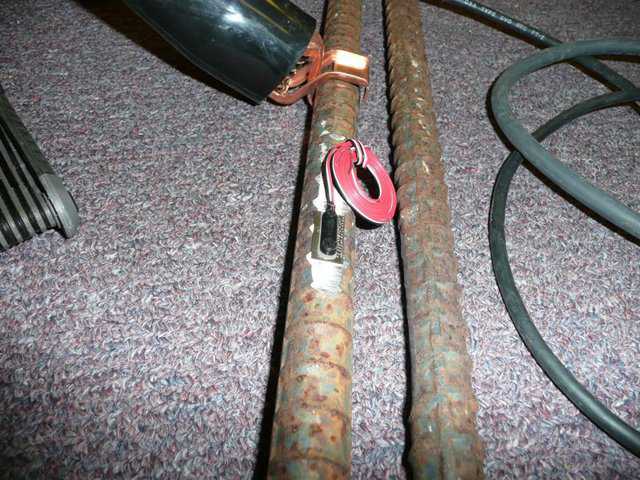
Our experts on the construction of Monolithic Domes contribute to this blog. They write about the progress and problems they might encounter at a specific job site; new products such as, Monolithic stucco; new technology such as our introduction of “Strain Sensors” to Monolithic construction; and new tools and equipment such as the “Paxis 10 Scaffold.” Most of the articles include a generous amount of photographs and diagrams. In addition to articles, this blog includes videos. For example in one video, you can see Monolithic’s Paxis 10 Scaffold in action. New information is often added for your review.


Beautiful mountain cabin ready for spring finish

The Heywood family cabin started over a year ago and is almost complete. It is in the deep snow of northern Arizona so they have to wait until spring to complete it. The dome is 58-feet diameter with three levels surrounding a central gathering room.

Rentals and Ecoshells: a good first step for your dome building business

Shown here is an Ecoshell with a 20’ diameter. It’s one of the first ones we built as a commercial building. Notice that it is spherical in shape. Made as an Ecoshell I, it was built during a Monolithic Workshop, here at our plant in Italy, Texas. It is about 20 years old and has worked very well for us. The structure was painted with a white exterior coating.

People go through one of our Workshops to learn about and actually experience the construction of a Monolithic Dome. Some actually want to start a dome-building business of their own. But what should they start with? What’s their first product – a Monolithic Dome home? That sounds far too complicated for most beginners.

An Attractive, New Augment

When Mike South built a new, small dome behind his home, he designed and built a tilted-out augment over the front entrance and the windows in back.  The front augment protects the door and provides shelter for folks entering the dome, while the back augment protects the windows.

When I decided to build a dome behind my house, I wanted to do something a little different. So we built a tilted-out augment onto the dome. The augment provides good protection from the elements. It keeps the doors and windows out of the rain, and it should make them last longer.

Dome enhanced with Monolithic Stucco

Aerial photo of the structure.

In 2008, Monolithic Constructors, Inc. completed work on a 50′ × 25′ central dome, flanked by two 36′ × 16′ side domes for Wayne Brannon of Decatur, Texas. About four years later, we were asked to coat the domes, that had rock applied to their bottom sections, with Monolithic Stucco.

Introducing the Quickshot

The Three Hole Model:  It comes with three holes, three small jets, three large jets, two jet plugs, and two hole plugs.

This handheld shotcrete sprayer is easy to load and has a surprisingly good throughput. We have used it to spray a number of small projects, and its fast, efficient design has saved us time and money. Its all-steel construction means that it is long lasting and will prove to be a good investment.

Rebar Splicing and Rebar Sizing

Footing rebar splice lap-lenth requirements

Monolithic’s recommended procedure for splicing rebar has changed. For years and years, we just overlapped the rebar and tied the bars together. In fact, when I first started we overlapped and welded the bars together. But it turns out that unless you’re using A706 rebar – which is very expensive – welding the rebar is not allowed. So we recommend that you stay away from welding.

Fly Ash Properties and Uses

Fly ash closely resembles volcanic ashes used in production of the earliest known hydraulic cements about 2,300 years ago. Those cements were made near the small Italian town of Pozzuoli – which later gave its name to the term pozzolan. A pozzolan is a siliceous/aluminous material that, when mixed with lime and water, forms a cementitious compound. Fly ash is the best known, and one of the most commonly used, pozzolans in the world.

Rebar: Bend or Don’t Bend?

To bend or not to bend? That is the question if you’re talking about bending reinforcing steel bars (rebar) that are partially embedded in concrete, as we do in the Monolithic Dome construction process.

Shotcrete vs. Gunite

If you want to start a fight, just ask a room full of spray concrete operators: What’s the best system for applying concrete?

Peggy Atwood’s Monolithic Dome Construction Slideshow

In 2006 in Shokan, New York, work began on Peggy Atwood’s Monolithic Dome home, that has two intersecting sections: 40′ × 23′ and 30′ × 18′. Now Peggy has a slideshow of that construction – and a lot more. If you’ve ever wondered what all goes into the building of a dome-home, watch this slideshow. It begins with the clearing of the site to a completed, furnished, beautiful Monolithic Dome home.

An Option to Avoid with Stitched Seams

The Ecker dome-home — after the Airform was inflated, its perimeter was sprayed with leftover, two-part, closed cell foam. It’s clearly visible as a bright yellow band along the foundation.

You may find this article helpful if your Monolithic Dome Airform has any stitched seams and also has a barrier material, such as foam along the exterior terminal edge of the Airform.

The Energy Detective

The Energy Detective’s real time display is part of the package.  Right now this unit sits on my kitchen counter, but you can remove it from the dock and walk anywhere in the house with it.

The Energy Detective is a device that lets you monitor the electric usage of your home. I bought one to track the energy usage of my dome-home and windmill. I was very surprised to find so much power in such a small device. According to the manufacturer of The Energy Detective (TED), just knowing what your house is doing and taking small steps to avoid using so much will drop your power bill 13% on average.

MetaMax

When we started the El Dorado Chemical Company plant in early 2010, we started doing some research on different additives to put in the concrete, to help with its chemical resistance. Early in our research, we came across an additive called MetaMax.

An old fashioned approach to dome layout

3-D Model — After brainstorming their floorplan, the Ecker’s built this cardboard 3-D model to study how light and room area might appear in their finished Monolithic dome.

Chris Ecker, a Monolithic Dome owner and designer, says, “There are numerous ways you could go about designing your dream dome, whatever the intended use will be. Based on our experience, here are our suggestions.”

Steel Rebar Placement in a Monolithic Dome

Workers attaching hoop rebar to rebar hangers

It’s important to understand why we use rebar (reinforcing steel bar) in concrete. It’s used to absorb tension forces in concrete, since concrete has very poor strength as a tension material. So correct placement of rebar is essential.

Considering a Second Floor?

Under Construction — Second floor and staircase during construction stage in the home of Gary Clark in Italy, Texas.

A second floor can be designed in a Monolithic Dome home. But we suggest you consider some important factors when deciding whether or not to put in a second floor in your Monolithic Dome home.

Practical Universal Design Ideas for the Dome Home Builder

Ecker Dome Home

How long are you planning to stay in your dream-dome? Probably decades and well into your elder years. With this in mind and a need for some practical, low- or no-cost universal design elements to handle physical needs, we offer these practical ideas that we incorporated into our dome.

iPhone Dome Calculator

Step 1: Install MACalc Pro — Once the application is installed click on the menu button on the bottom left of the screen, then click on settings.

When the iPhone came out, we could immediately recognize the benefits. We knew that if we were going to make the switch to the iPhone, we would have to come up with a dome calculator.

Video of Paxis 10 Scaffold

You will hear a lot more about our new Paxis Scaffold in the future on Monolithic.com, but in the meantime I will post some raw video clips. It’s hard to describe how nice this scaffold is, but with the new drive motors and the 10′ stance, this scaffold makes one of the sturdiest, safest platforms I have ever seen.

Progress at St. Joseph Church

The new paxis scaffold was a huge success, even though there are a few things that we are going to do differently. The one thing that we didn’t expect, was that it was so heavy that it started to make some pretty substantial ruts in the ground. We have been toying around with a few different ideas. First, I think we will pour a concrete circle in the middle of the dome so that the pivot point and tires have a harder surface to rotate on. Secondly, I think we will try to find some wider tires for the outside wheels, and change the way the motor is mounted so we have more ground clearance.

The New Paxis Scaffold

The New Paxis 10 Scaffold System — These images show the building of the first Paxis 10 Scaffold

Problem: Scaffold an 88 foot dome that has only 4 36″ standard doors?
Solution: Expand our already proven Polar Scaffold to fit that size of a dome.

Strain Sensors installed on the St. Joseph Church

Strain sensor — This a strain sensor being welded to a #6 bar.

Through the years of dome building we have always been playing a guessing game when it comes to reinforcement. So we finally found a way to find out once in for all, what is happening in these domes?