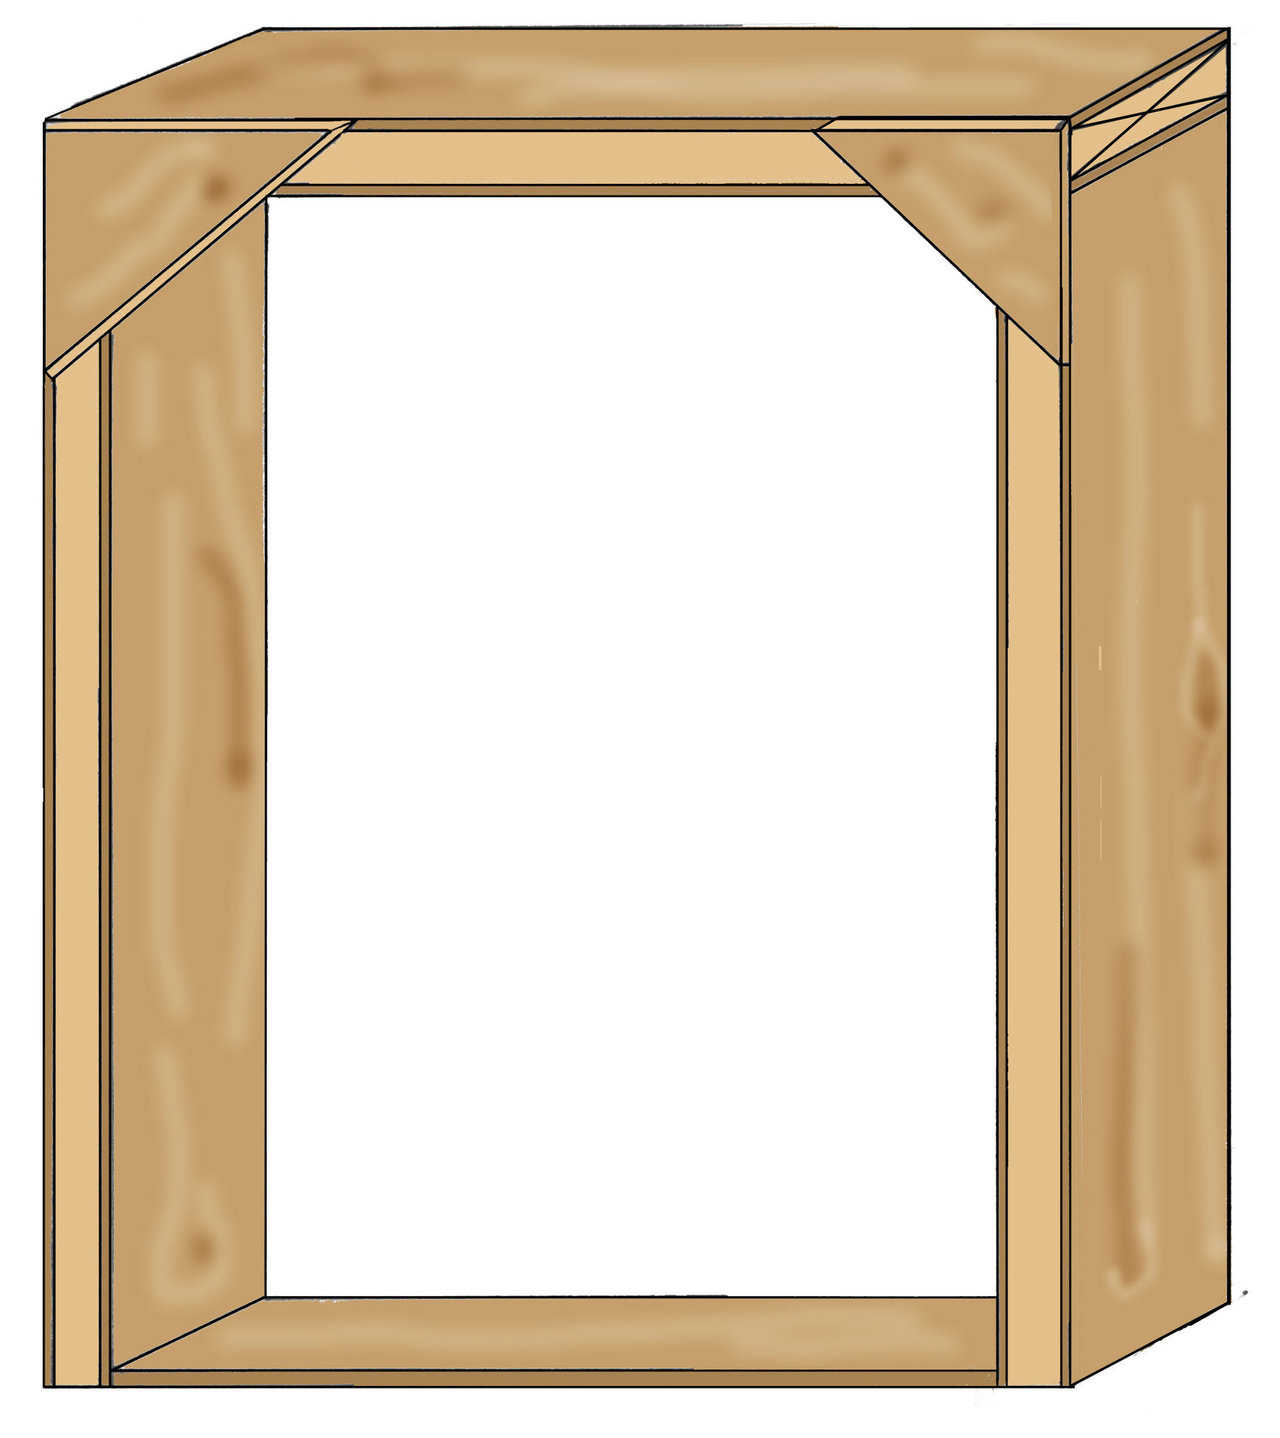
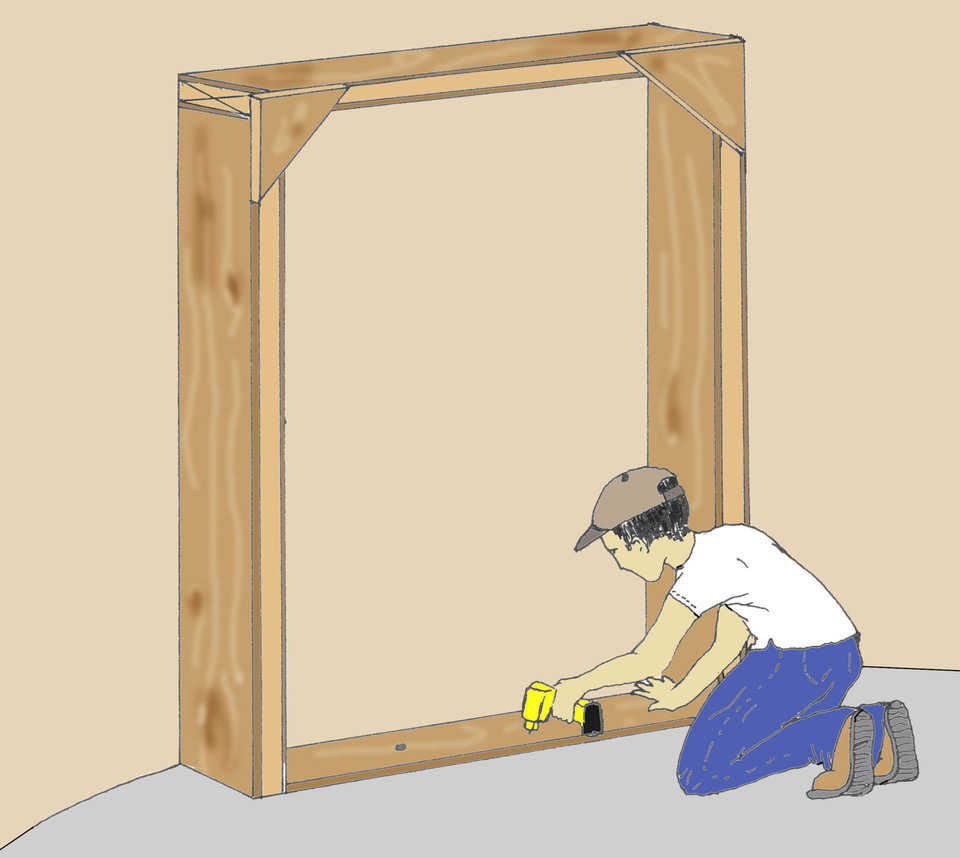
Framing Buck — 1. Before inflation, using pressure treated wood, construct framing bucks with outside dimensions to match the front face of the augment.
Installing Augment Frames
Planning the perfect augment
In a Monolithic Dome, an augment is an extension of the Airform. That extension creates a vertical surface, beyond the curve of the dome, where a door or window can be installed.
A smooth augment is achieved by properly planning the Airform.
It is essential to know the window manufacturer and window size before the Airform is patterned. The exact outside dimensions of the window buck must match the design size of the augment.
These measurements help your architect create augments that exactly fit your windows. Determining if your augment will be recessed or mounted flush to the outside creates variations in your Airform. Any slight variation in measurement can produce wrinkles in the augment.
DO NOT APPLY FOAM UNTIL WINDOW BUCKS ARE IN PLACE.
Installation
- Before inflation, using pressure treated wood, construct framing bucks with outside dimensions to match the front face of the augment. For round cornered door bucks, try using the Monolithic Quick Corner.
- Inflate* the Airform. Leave it inflated for a day or two to stretch the Airform.
- Decreasing the water pressure can aid in the installation of the door bucks. The pressure can be lowered to .5 inch if needed.
- Attach a strap to the top corners using screws or eye bolts.
- Attach the straps to stakes, t-posts or some kind of earth anchor so that it can pull the door bucks plump.
- Increase the water-column pressure back to 2 inches.
- Once your stable construction pressure has been attained, reassess the buck to be sure it is still level and plumb. Make any necessary adjustments.
- To ensure that the bucks stay in place, attach the bucks to the concrete footing. This is important for door openings or openings that go all the way to the floor. Some windows are not designed to extend to the floor and do not need to be secured to the concrete footing.
- Foam will not adhere to moisture. Dry the Airform completely before applying foam by covering the concrete footing with plastic so that no further moisture can accumulate on the Airform. Allow Airform to dry. Next, apply Monoform Primer using an airless sprayer or roll it on with a roller. It should be a very light coating (400+ sq. ft. per gallon). This primer was specially formulated for use in Monolithic Dome construction. Use of this primer allows the foam to better adhere to the Airform. Allow the primer to dry completely before applying foam.
- Check buck alignment again after foam is applied and make any necessary adjustments. At this point, you are ready to install rebar in the dome. Each augment increases the price of the Airform. Additional pattern charges will be assessed for variations in size and shape of the augmentations. However, the increased cost of the augment can offset the cost of placing windows and doors using other methods. Feasibility and pricing of larger augments are calculated on an individual basis. A free evaluation offers general pricing.
*Keep in mind that airforms can stretch up to two days after inflation. This stretching should not hinder the installation of door bucks, but you can use it to your advantage if it becomes hard to level the door bucks after installation. Just pull them tight then overnight they can stretch a bit so you can stretch them the rest of the way.
Note: We originally presented this article in The Roundup, Fall 1999.
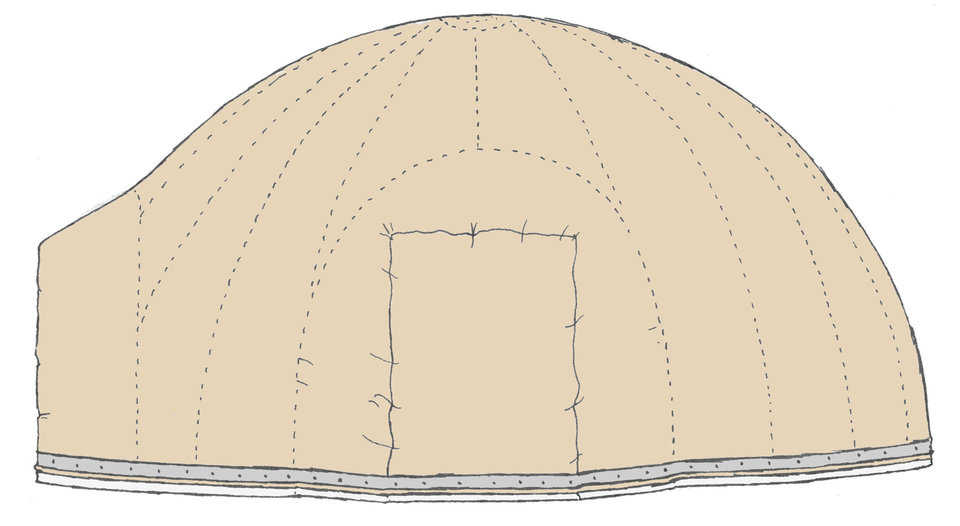
Augment Drawing — 2. Inflate the Airform. Leave it inflated for a day or two to stretch the Airform.
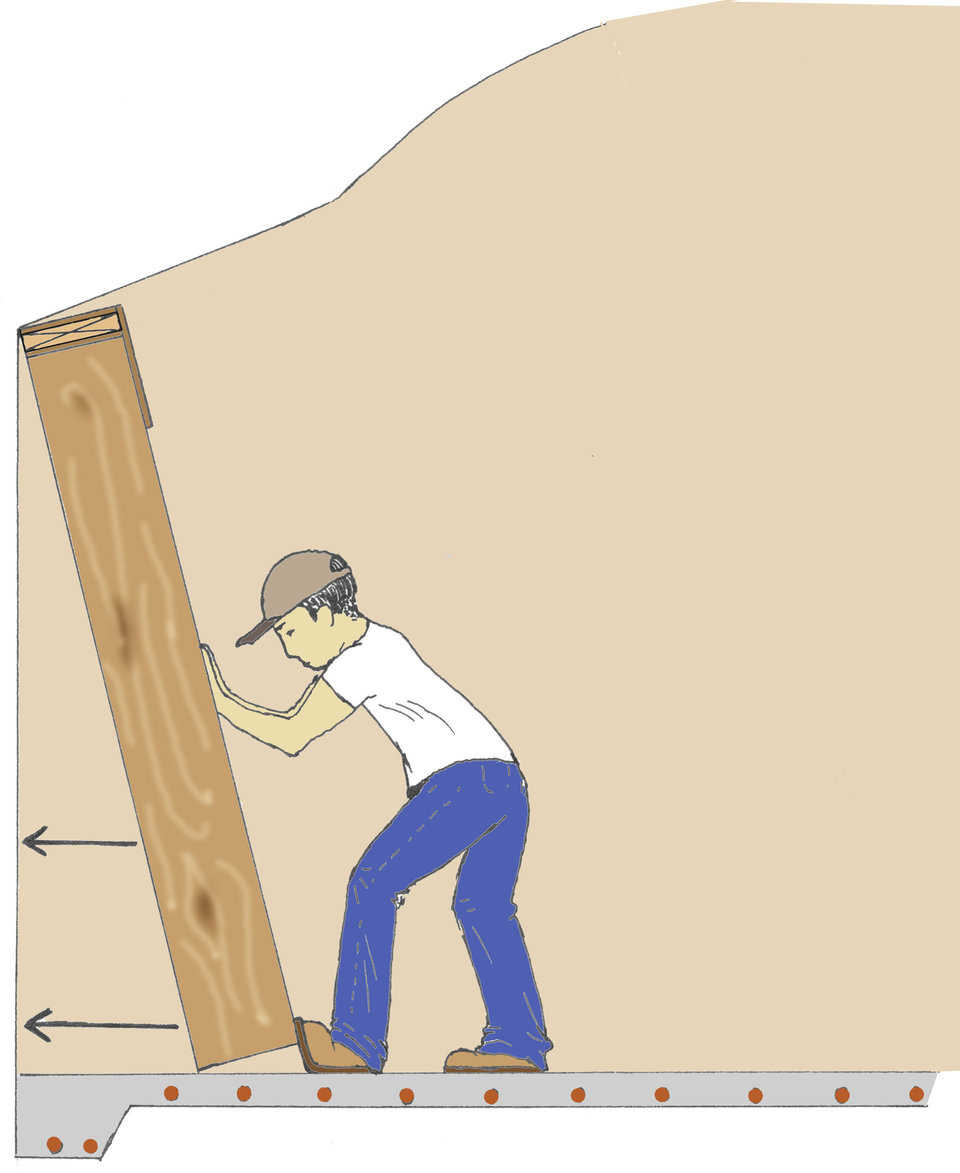
Install Bucks — 3. Decrease the water column pressure to approximately .5 inch. Install the framing buck at this time.
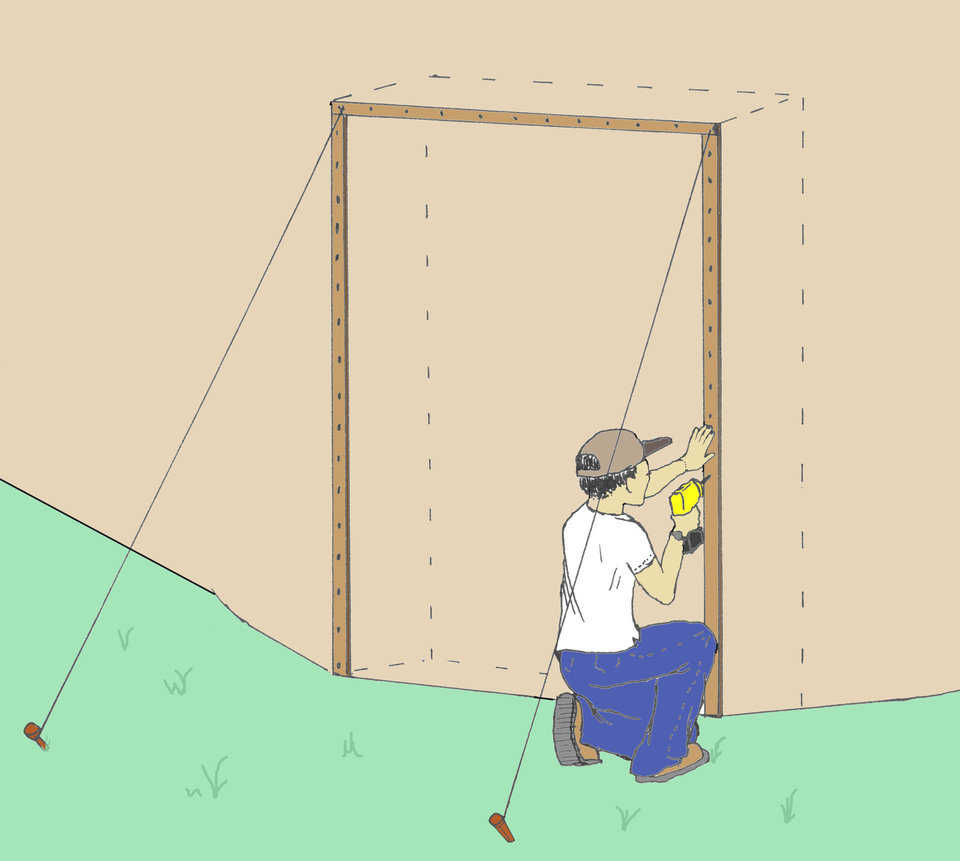
Attach Stakes — 4. Attach the stakes on the exterior through the Airform and into the window buck. Get the bucks plumb and level.
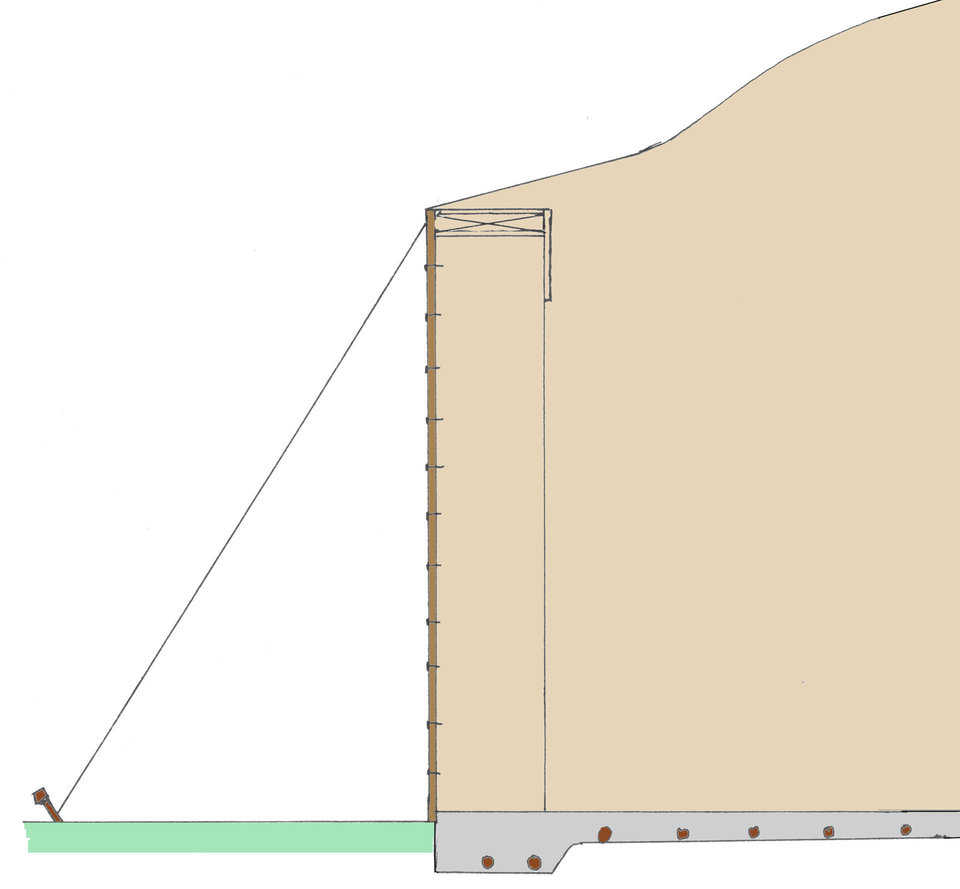
Brace Stakes — 5. Brace them solidly from the inside or the outside by attaching guide wire to the top of the bucks through the Airform, then securely stake the wires to the ground.
6. Increase the water-column pressure back to 2 inches.
7. Once your stable construction pressure has been attained, reassess the buck to be sure it is still level and plumb. Make any necessary adjustments.
Attach to Footing — 8. To ensure that the bucks stay in place, attach the bucks to the concrete footing. This is important for door openings or openings that go all the way to the floor. Some windows are not designed to extend to the floor and do not need to be secured to the concrete footing.