Prepare to Foam
Polyurethane Foam Application
The Big Question: Do it myself or hire a contractor?
In most cases, we advise hiring a foam contractor. Foam machines are difficult to maintain. Unless you plan to start a foam application business, purchasing a foam machine is probably not worth the hassle.
However, it is imperative that you, the dome owner/builder, understand the basics of foam application to monitor the process and look for potential problems. This article describes the process and could be given to a foam contractor so expectations are clear. Always check references!
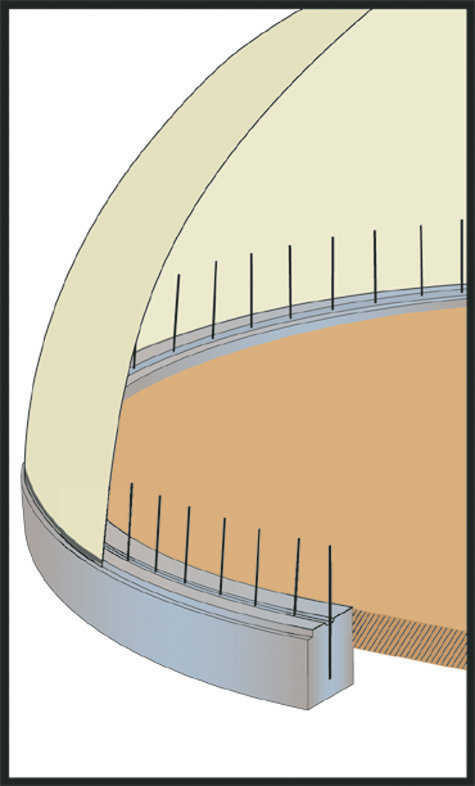
Step 1: Cover and Protect
Cover the rebar, equipment and floor with plastic to protect from foam and shotcrete overspray. The plastic also helps hold moisture in the ground. When the sun shines on the outside of the dome, moisture vaporizes. If the floor is covered, the moisture on the Airform exits through the ventilation holes in the airlock.
Pay close attention to any signs of moisture as the Airform stretches. Even unseen moisture can cause problems. Some foam guns have air blowing out the bottom while in use. Make sure the air supply to the gun has a water trap on it. This allows water to drop ahead of the foam and not contribute to any moisture problems.
DRY THE AIRFORM: THE AIRFORM SURFACE MUST BE DRY BEFORE APPLYING POLYURETHANE FOAM.
Foam will not adhere to a wet surface. AGAIN, any moisture on the surface before spraying will cause blistering. Give the Airform time to dry. You can heat the inside to eliminate moisture if needed. For details on how to do this, call Monolithic.
Step 2: PRIME!
If you want something to stick to the Airform, you need to use a primer! Treating the Airform with Monoform Primer is an absolute must! Monoform creates a better bond between the Airform and the foam; it acts as a glue for the foam. It can be applied with an airless paint gun over the entire interior Airform surface. It can also be rolled on. A thin layer is all that is needed (300-400 sq. ft. per gallon). Let the primer dry completely before applying foam.
Step 3: Choose a Foam
Foam comes in several set times and is available for cold or warm weather. The speed of foam used depends on the season and climate. Accurate ratio foam will rise perpendicular to the surface being sprayed against. If the foam slides, it is not setting fast enough. Use the fastest setting foam available for the season and climate. A professional foam applicator should have an in-depth knowledge of cold or warm weather foam. The foam machine needs to be adjusted to spray one part Chemical A and one part Chemical B (1:1 ratio). Off-ratio foam will result in too much of one chemical on the Airform.
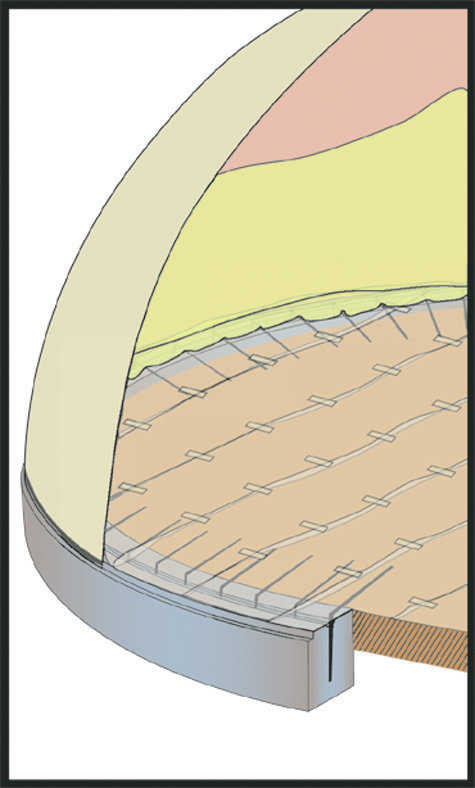
Step 4: Foam Application
Seal bottom of the interior surface of the Airform with foam. Do not cover rebar in the keyway or spray foam in the keyway.
Spray the first layer, working your way up from the bottom. It is easier to solve possible startup problems from the ground than on top of a scaffold. Spray foam evenly to 1/2-inch thickness on entire interior Airform surface. The foam will dry to the touch in three to four seconds, but cross linking literally takes hours. The foam will have lots of stretch and pull for a considerable amount of time. After the gun is running well, and after the first pass, you can start at the top and work down, especially on hot days. Heat generated by the foam rises, making a hotter work environment.
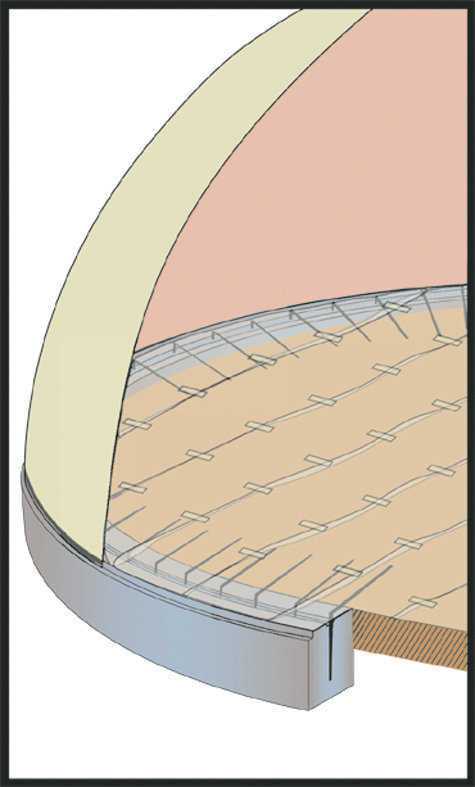
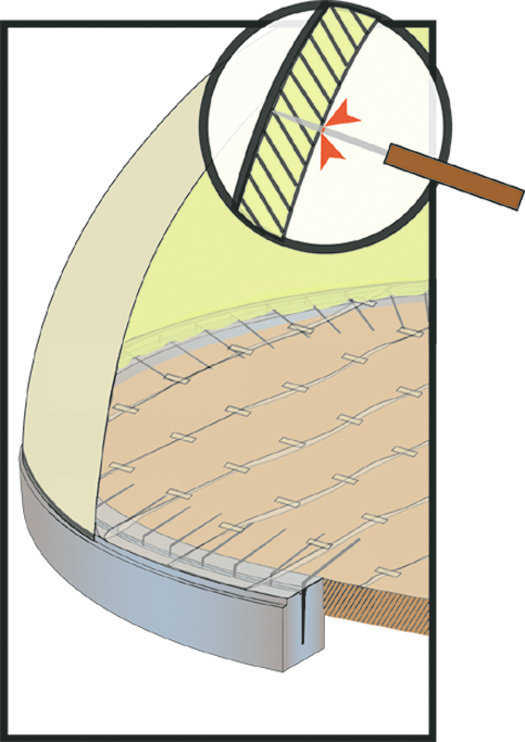
Step 5: Test Thickness
Spray another 1/2- to 3/4-inch layer of foam, making the total thickness, at this point, an inch and a quarter.
Test the thickness of the foam by gently probing with an ice pick. Do not probe too much as it may make holes in the foam which can cause blistering. A lot of probing also increases the risk for puncturing the Airform. A good foam applicator will not need to probe test for thickness very often. One safe way to test thickness it to take a welding rod and grind a pointed tip on the end, then tape it to a broom handle with duct tape. A piece of duct tape can be placed on the depth gauge at the 3-inch mark or whatever measurement mark is needed.
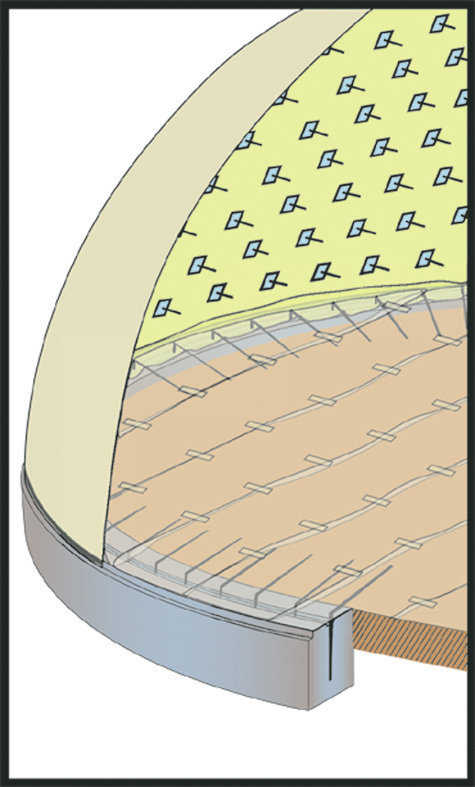
Step 6: Rebar Hangers
Rebar hanger placement requires extensive details; therefore, the next topic for do-it-yourself will be rebar hanger placement and final layer of foam application. For further training in foam application, you can attend a Monolithic Dome Workshop or a foam application training session offered by many equipment vendors.
Note: Reprinted from the Roundup, Summer 2000

Cover and protect
Prime
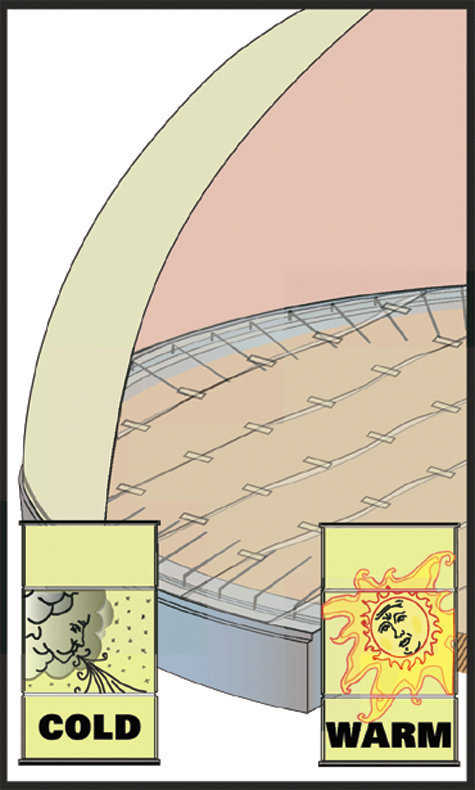
Choose a foam
Foam Application
Test thickness
Rebar Hangers