The Monolithic EcoShell I — The EcoShell I is a super-strong structure that can withstand hurricanes, tornadoes, earthquakes, fire, termites and rot.
The Monolithic EcoShell I
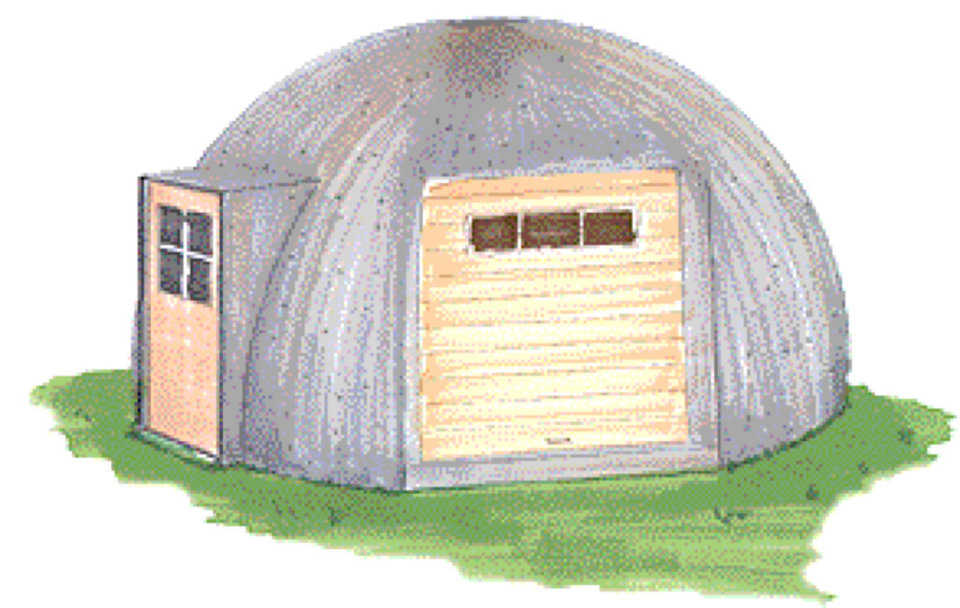
EcoShell I – Defined
An EcoShell I is a concrete, thin shell dome whose construction process includes a relatively new technique called Airforming. This technique uses an Airform that’s made of a high-strength, high-tech fabric. When inflated, the Airform, looking like a semi-rigid balloon, creates the EcoShell’s dome shape.
The Airform used in the construction of an EcoShell I is removable and reusable. With proper care, it can be used 100 or more times, and that feature significantly lessens construction costs for projects involving more than one structure.
For an EcoShell I, concrete is layered onto the exterior of the inflated Airform. Usually, the shell is not insulated, but can be by including polystrene beads, vermiculite or perlite into some of the concrete as it’s applied. This insulation and the thermal mass of the concrete does provide some serious thermal protection.
The EcoShell I is a super-strong structure that can withstand hurricanes, tornadoes, earthquakes, fire, termites and rot.
EcoShell I – How it’s used
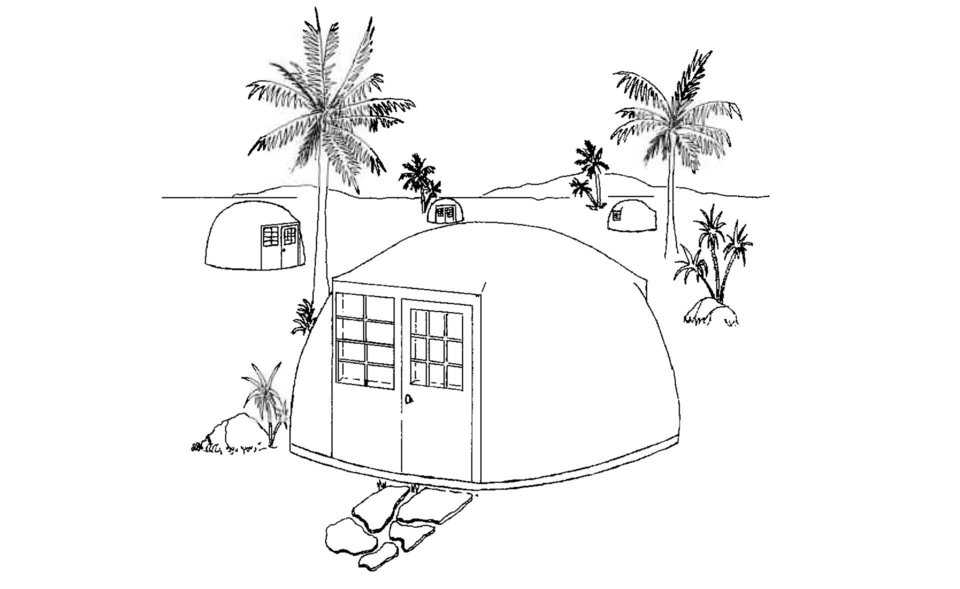
EcoShells have different uses. In industrialized nations, particularly those with temperate or cold climates, such as the United States, Canada and Great Britain, uninsulated EcoShells make an ideal garage, small warehouse, grain storage, shed or workshop. In other words, possibly with the exception of those living in Hawaii, an EcoShell is not suitable housing for most Americans.
But in the developing world, most of which has a tropical or equatorial climate, EcoShells can provide permanent, secure, easily maintained and – most importantly – affordable housing.
In addition to homes, people living in those areas greatly need food storage facilities, particularly for grains. David B. South, president of Monolithic and Chairman of the recently formed, nonprofit Domes For The World Foundation (DFTW), said, “Almost 50 percent of all stored food grown in developing countries is wasted because they don’t have proper storage. So rice, wheat and other foods get infested by rats and vermin. A concrete, virtually impenetrable structure could prevent much of that.”
Then too, EcoShell I construction can boost the economy of a developing nation by creating jobs. Much of the construction can be done by hand, and locals can be trained to build them.
“The building process of an EcoShell I is a relatively simple and safe one,” David said. “If a mistake is made, the EcoShell I is more forgiving than are more complex structures.”
EcoShell I – How it’s built
Monolithic has developed a booklet titled EcoShell I that illustrates and details the construction process, with sixty, captioned drawings. David said, “We already know that most workers – even those who cannot read or speak English – can catch on to how something must be done by studying this booklet’s cartoonlike illustrations.” Some of those illustrations are reproduced in this article, at the end of this section. The booklet is available either as a download or purchase through the Monolithic Marketplace.
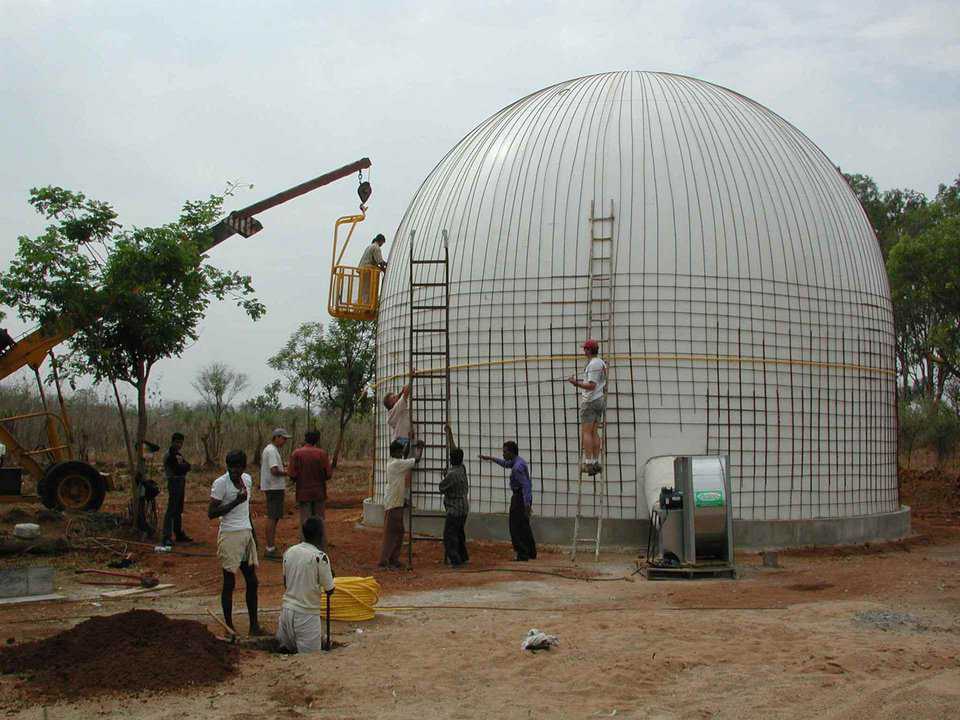
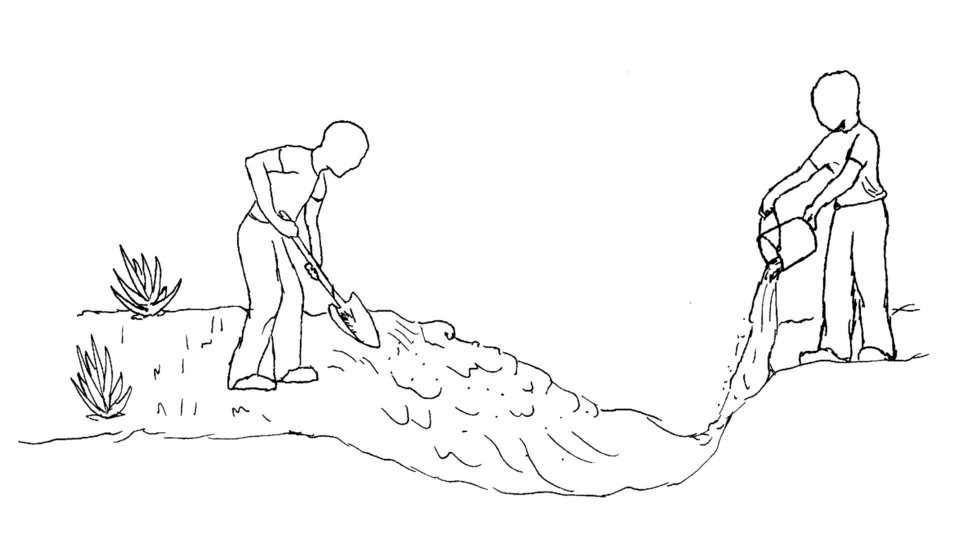
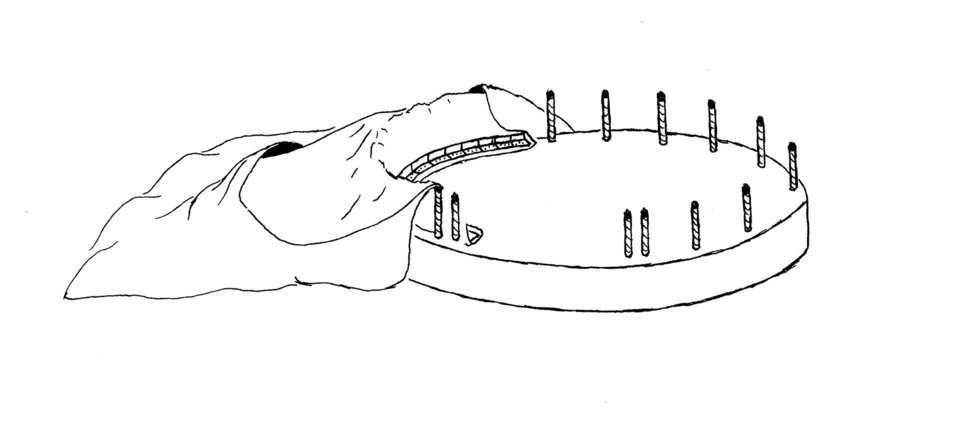
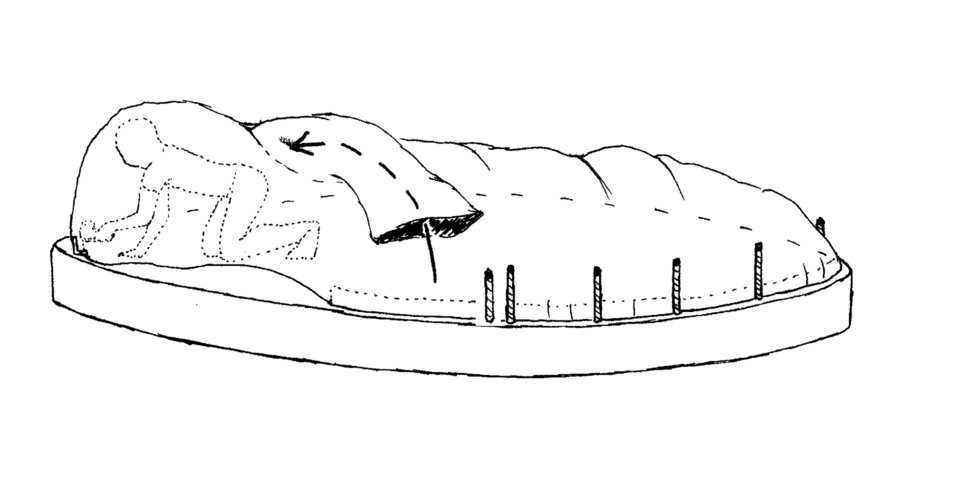
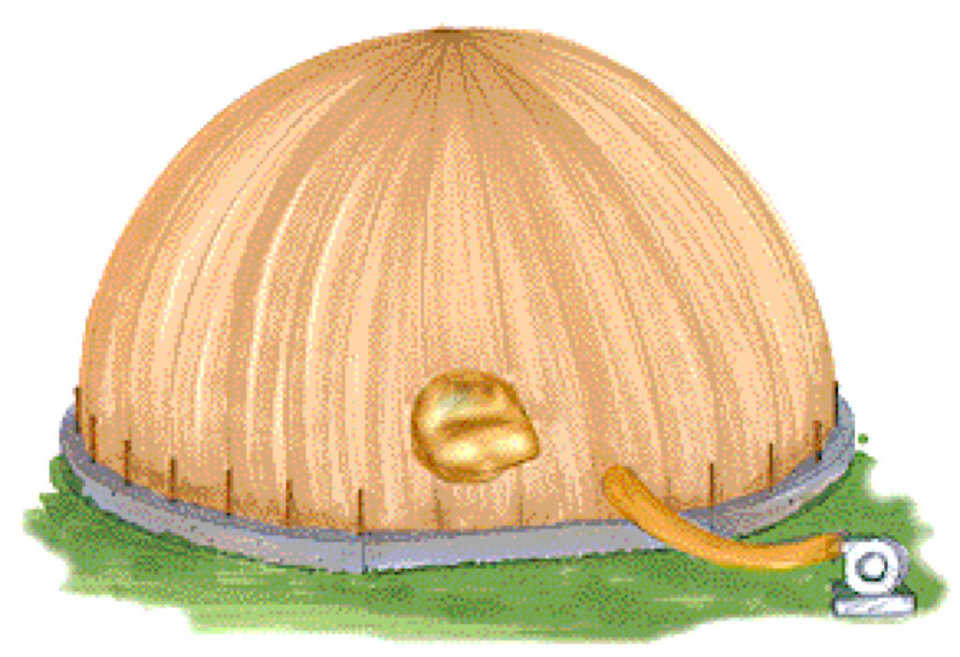
Construction of an EcoShell I begins with a small group of workers pouring a circular floor, to which the Airform is attached 2 inches in from the edge. The Airform is inflated with a small, high-pressure fan, such as fans used for heavy duty vacuum cleaners. After the Airform is inflated, rebar and then concrete are applied over its exterior.
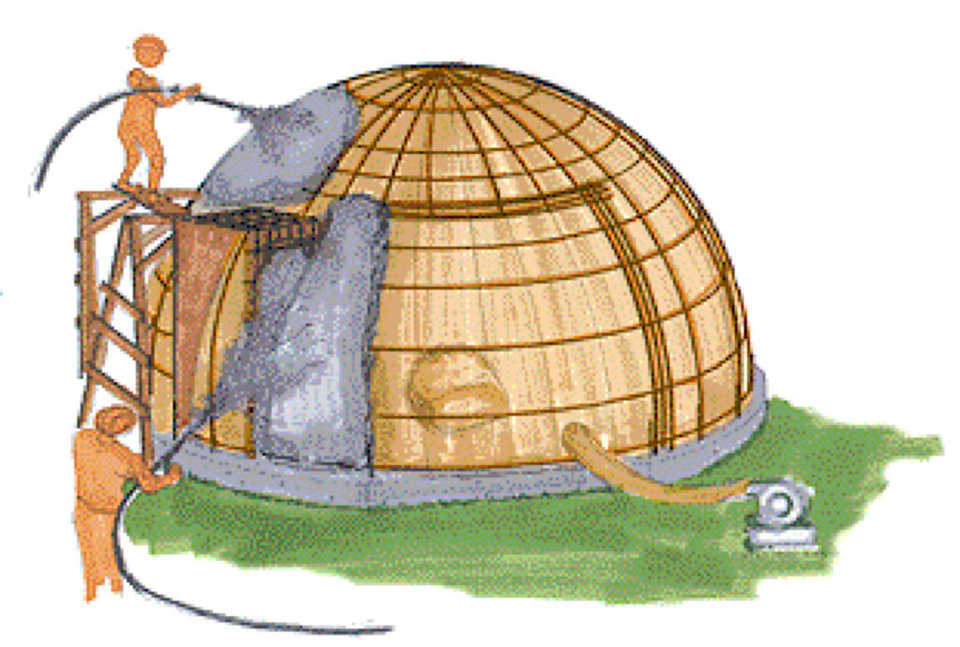
The concrete can be mixed in a bucket or a fabric mixer and hand applied, or it can be mixed with commercial mixers and sprayed in place with Shotcrete equipment. This latter method obviously takes less manpower and at times produces better results. But the former method is also satisfactory and can be completed by inexperienced laborers.
Once the concrete sets, the Airform is removed.
When the EcoShell is to be used for bulk storage, the engineer must calculate the amount of side wall pressure and a corresponding increase in rebar must be added. In addition, there are several products available to add to the concrete mix that reduce cracking and increase concrete quality.
Since the EcoShell is generally not insulated, it won’t be climate controlled, but its concrete does have some thermal value. And it can be covered with thatching, straw or dirt for insulation. Its roof can be coated with aluminized asphalt or a high grade exterior paint, preferably white to reflect heat. Recently we have added a layer of concrete that has polystyrene pellets, or vermiculite, or perlite added to it for insulation. Click here to see video explaining this process.
While the EcoShell I has its advantages, it also has its limitations. For example, Monolithic does not recommend building an EcoShell I with a diameter of more than 40 feet (13m). Since men are working on top of an Airform there is always a risk to them of sudden collapse.
All things considered, the EcoShell is one of construction’s strongest buildings. It is virtually impervious to fire, tornadoes and earthquakes. It is especially practical in countries lacking wood and steel. Most countries have concrete and rebar on hand. In general, using the same amount of cement, aggregate and rebar, three EcoShells can be built in place of one conventional, concrete structure.
See captioned illustrations Step 1A-6A showing an EcoShell I’s construction using the “flipping” method to apply Shotcrete.
Also see captioned illustrations Step 1B-5B showing an EcoShell I’s construction using a spray gun to apply Shotcrete.
Click here to purchase book, How to Build an EcoShell I.
ud 04.2014
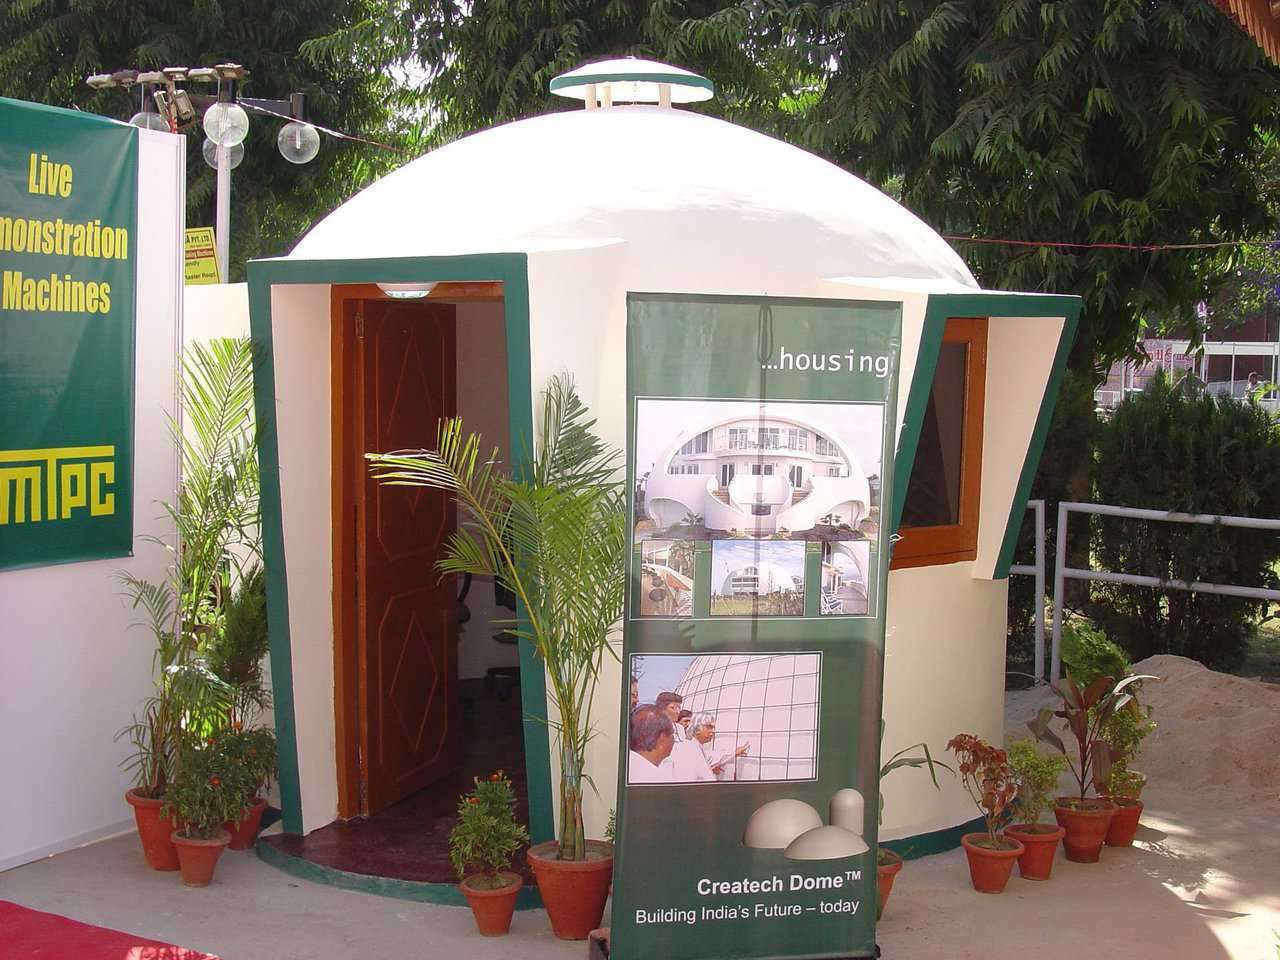
New Oroville, India — These EcoShells are 32 feet in diameter and 26 feet tall. This company plans on building four thousand more structures.

Catalytic Software — This housing complex includes multi-family housing, offices, and recreation areas.
UniShell — Monolithic’s UniShell is the ideal EcoShell I for housing in developing nations. It has a 20-foot diameter and 314 square feet of living space. It is 29.3 square meters in size.
Step 1A
Level Ground — After everything has been removed, level the ground.
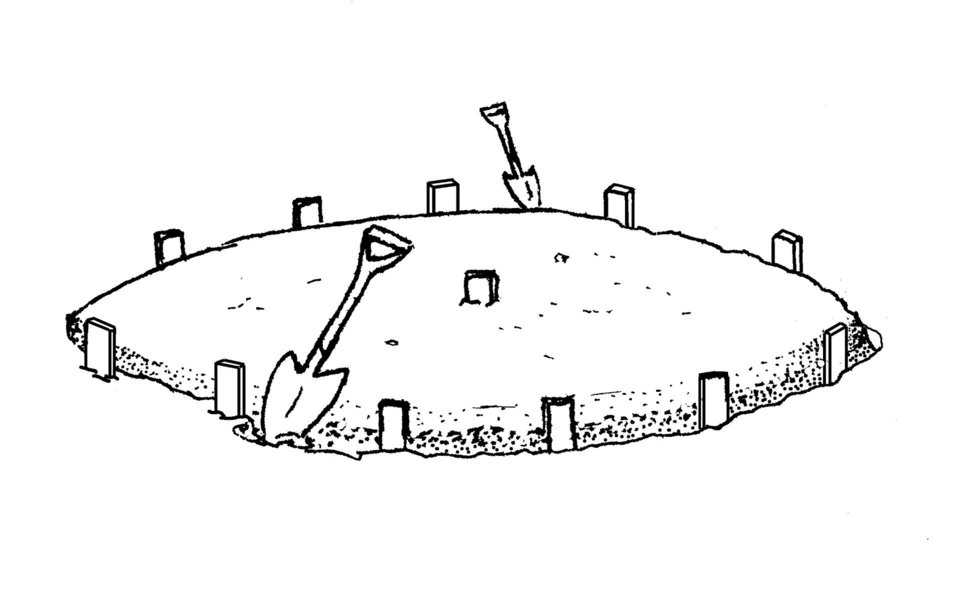
Step 2A – Dig Trench — Dig a footing trench approximately 8” x 8” (20 cm x 20 cm) on the inside of the perimeter stakes.
Step 3A – Clamp Angles — Continue placing clamp angles along the guideline. Fabric must be stretched along the line and kept even. Otherwise, there may not be enough fabric to go around.
Step 4A – Crawl Thru Sleeve — As placement continues, workers placing the clamp angles will end up inside. They will crawl out through the sleeve. Use a saw horse or other bracing device to hold the fabric off the workers.
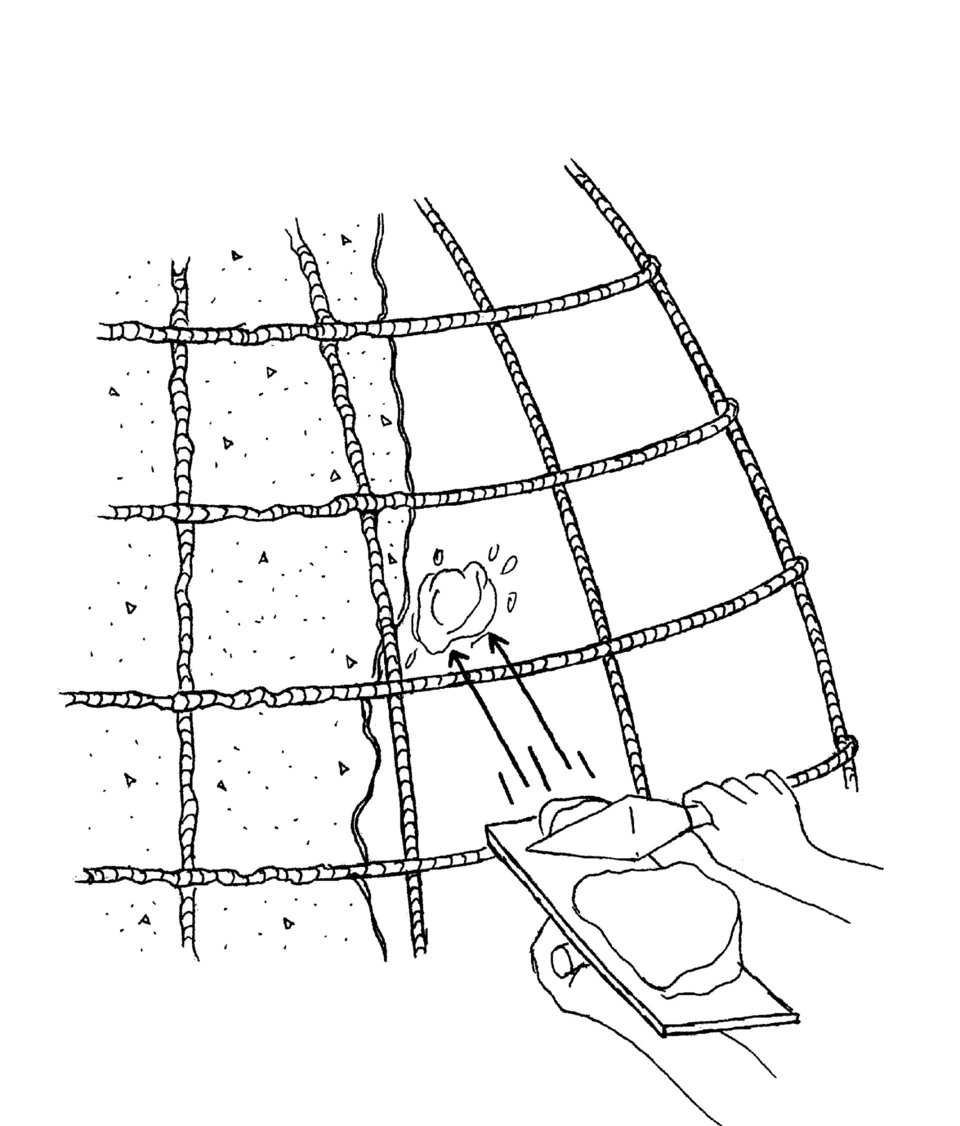
Step 5A – Concrete Layer — First layer of concrete can be hand applied. Concrete can be troweled or “flipped” on with a small mason trowel. It can also be applied with a Shotcrete pump. Place only what will stick.
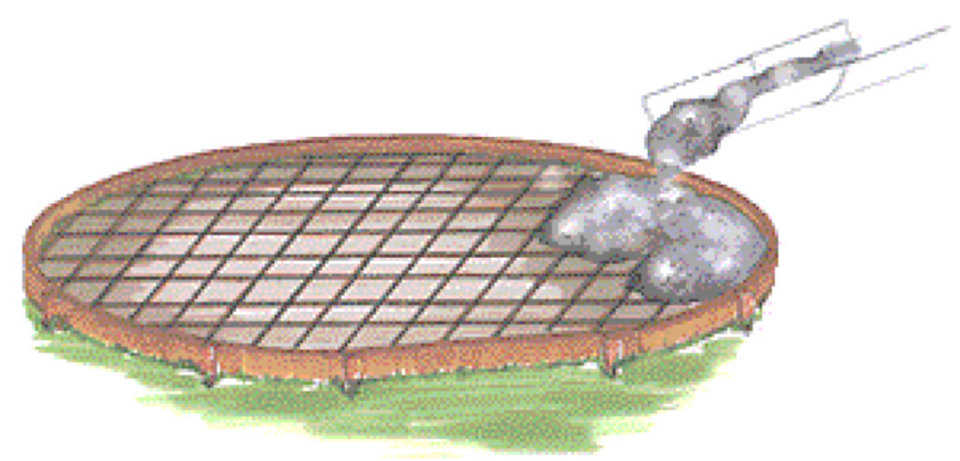
Step 1B – Ring — EcoShell I starts as a steel reinforced concrete ring foundation/floor. Vertical steel bars embedded in the ring are attached to the steel reinforcing of the dome itself.
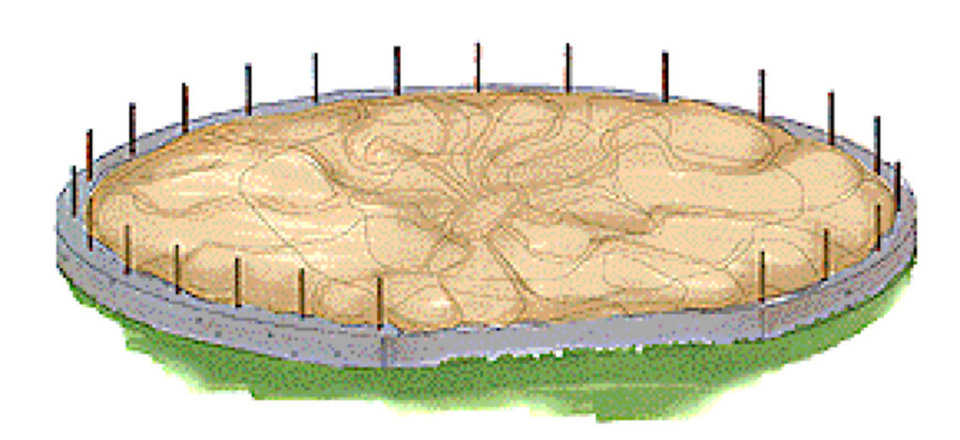
Step 2B – Airform — After the Airform is spread and fastened to the floor, it must be sealed to prevent air leakage.
Step 3B – Inflation — Using blower fans, the Airform is inflated. This creates the dome shape of the structure.
Step 4B – Rebar — Rebar is placed, spaced per engineering. Verticals go against the Airform; horizontals go on the outside. Additional plywood frames for doors and windows can be set against the inflated Airform. Remove from inside after concrete sets. One inch of Shotcrete is applied to the exterior of the Airform, allowed to set, then recoated to finish. (Concrete can be hand applied with a trowel.)
Step 5B – Complete — Remove Airform after the concrete is set. Now that the shell is finished, hang doors, windows and vents. The EcoShell can be used as is or it may be roof-coated – preferably white to reflect heat.