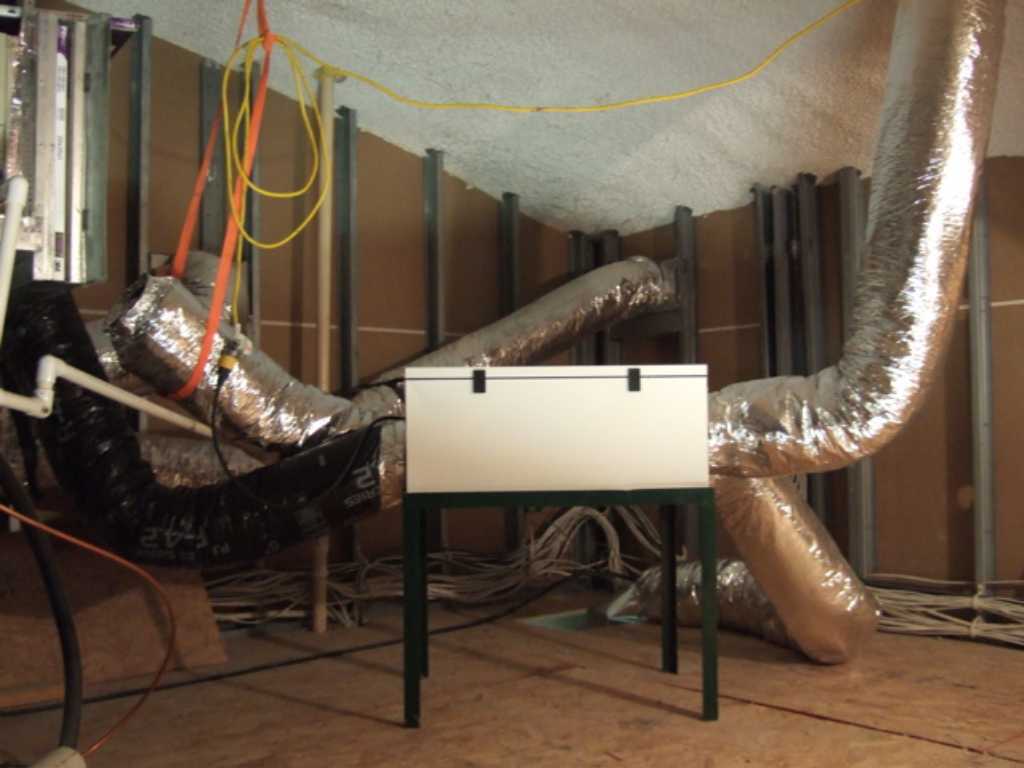
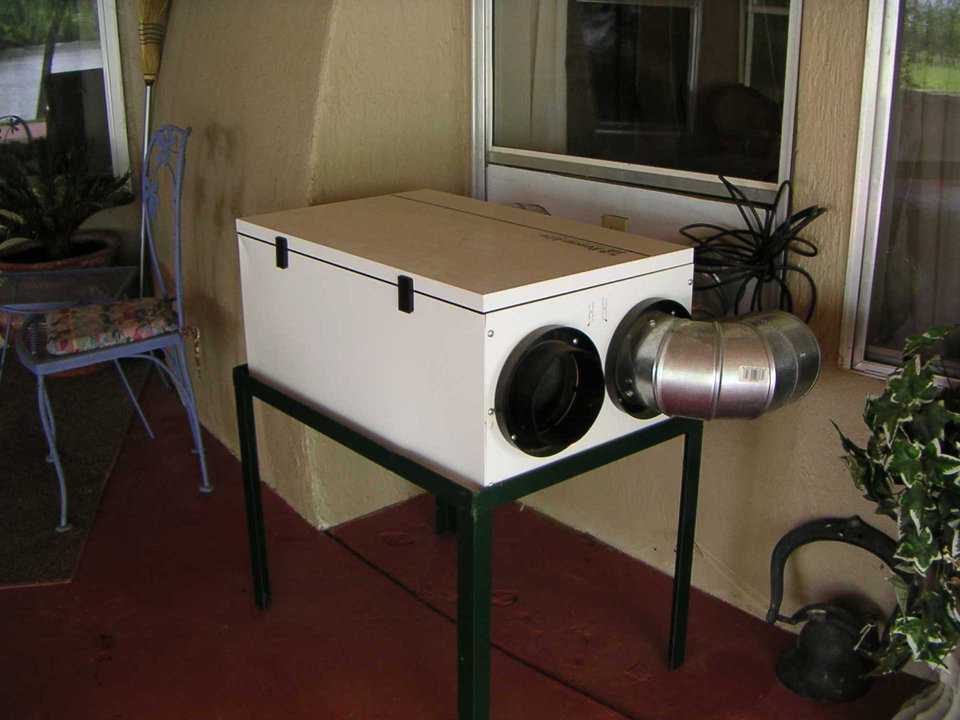
RenewAire EV130 ERV — The ERV Unit itself is hooked up.
Installing an ERV in a Monolithic Dome Home
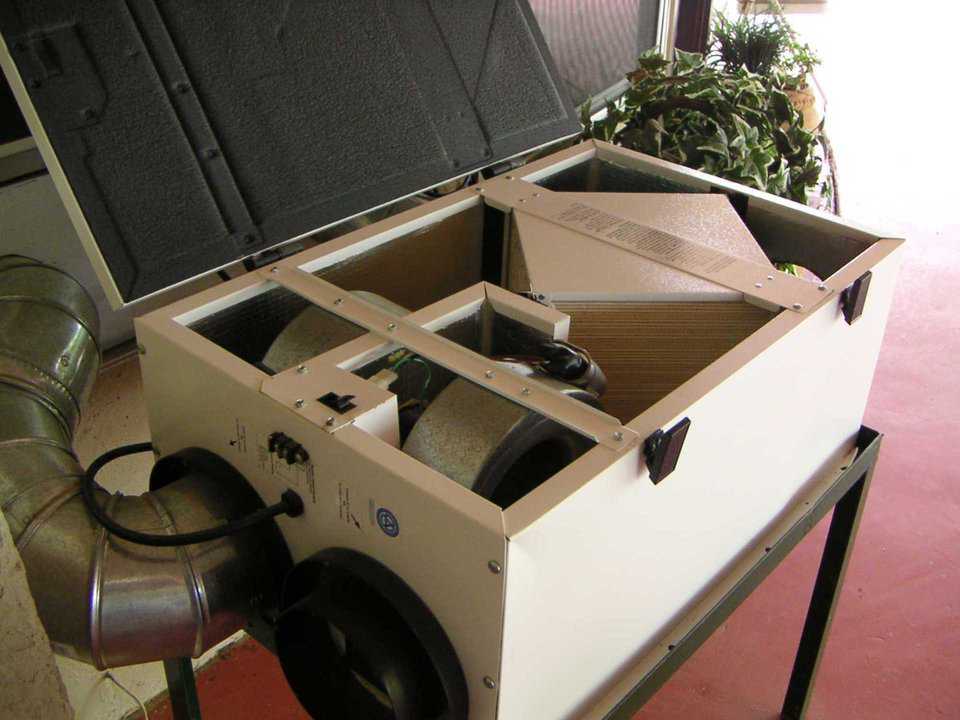
I installed a RenewAire EV130 ERV that’s small, quiet and efficient in the attic of our home in about three hours.
Materials Used:
- 2 – 6" sleeves (to stick through the dome wall)
- 2 boxes (50’) of insulated 6" ducting
- 1 – 6" vent adapter
- 2 roof vents
- 1 roll of silver duct tape
- 1 tube NP1 Caulking
- 8 self tapping sheet metal screws
- 1 timer switch
- 1 single gang old construction electrical box
- 50’ romex electrical wire
- 1 can of foam in a can
Tools Used:
- Bosch 1/2" SDS Hammer Drill
- 1/2" drill bit
- chisel bit
- Shop Vac
- 18v Cordless Drill
- Knife
- Small Sledge Hammer
- Reciprocating Saw with metal cutting blade
Step-by-Step Instructions:
- Drill two holes through the dome, one for incoming fresh air and the other for the exhaust. Holes should be about 2" apart and only to the depth of the concrete, not all the way out of the dome. The Airform is cut out last. I held the 6" sleeve to the concrete and marked a circle around to show me how big to drill the holes. Then I drilled 1/2’ holes about 1/2" outside of the line. I wanted to make the concrete hole just a little bigger than the sleeve for easy installation.
- Once I had all the perimeter holes drilled, I drilled 2 or 3 in the center of the circle. Then came the fun part: I used my sledge hammer to break out the circle I had drilled. If you find some rebar, use a reciprocating saw to cut it out of the hole.
- Now that you have a hole in the concrete, dig out the foam until you expose the Airform but don’t cut the Airform yet. Do that last.
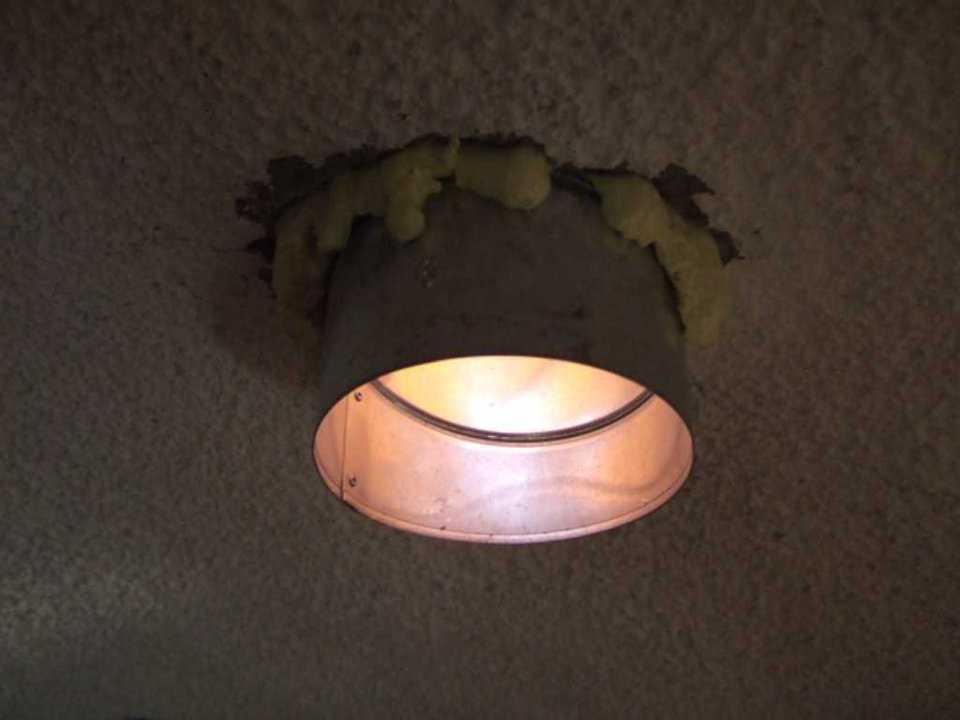
- Insert the sleeve into the hole and foam it into place with canned foam. Once I had both holes drilled and the sleeves foamed in, I went on top of the dome. Marking the center of the holes with a screw, I cut a hole into the Airform that was the same size as the sleeves I had foamed into place.
- Glue the roof vent covers right onto the Airform. My roof vents were covered with oil, so I used PVC primer to clean the oil off the metal before I glued them to the Airform.
- Apply a healthy line of caulking to the underside of the vent, then press the vent onto the Airform on top of the hole. After I glued my vent, I added some self-tapping screws to help hold the vent on the Airform. Screws with wide threads provide the best hold.
- Make a stand for the ERV to sit on. Option: ERV can be hanged or attached to a wall.
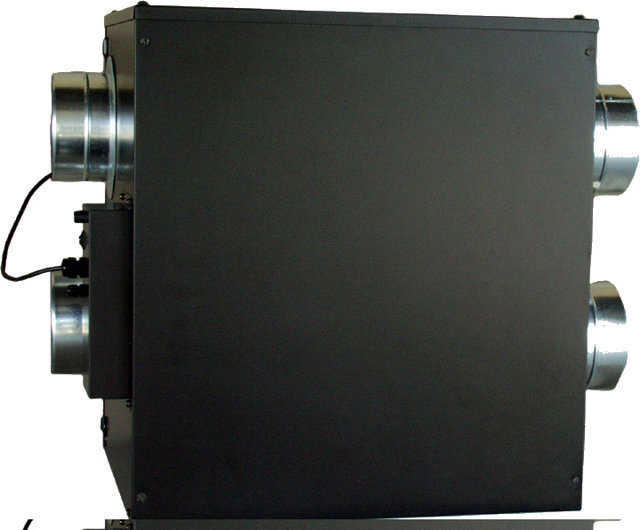
- Connect the vent pipes. The ERV has four ports: air to be recycled, air to be exhausted, incoming fresh air, fresh air let out.
Domes are designed a little differently than normal houses in that we condition the air in our attic as well as the air downstairs. So I decided to take the air from one of the incoming vents in the attic and dump it into the intake of the central unit. This made my job super easy. (Obviously, there are other ways to do this. In another house, we installed vents, much like the central AC vents, to make the intake and output vents.)
Once I had all our vents hooked up and our ERV mounted, I needed to install a timer. I bought my timer online from Smart Home. Later I saw it on sale at Home Depot.
If you need help hooking up the electrical, get an electrician. I used the “old construction” box to install the timer switch downstairs. An “old construction” box is one that slides into a hole in the sheetrock and has flanges that fold out and hold the box in place.
We had been measuring our CO2 levels in our house for a few weeks before. Our chart shows 4 days of readings.
We installed the ERV in the summer and ran it for 6 hours every night, 12 a.m. to 6 a.m. We ran it at night because we wanted the coolest air possible. Now that it is winter, we run the ERV during the day. This brings our CO2 level to about 800 ppm (parts per million) and then up to around 1500 to 1800 ppm. Twelve hundred ppm is considered maximum for commercial buildings (see Fresh Air and ERVs). Outside air is about 500 to 600 ppm. I calculated that 6 hours was enough time to exchange all the air in our 50’ dome home.
The other advantages that we discovered included a 10% decrease in humidity and a really noticeable difference in the way we felt when we were in the house. Raising four kids we stay moving, but we felt like we had more energy after the ERV was installed.
Click here to check out the RecoupAerator Whole House Unit ERV!
Note: January 2007
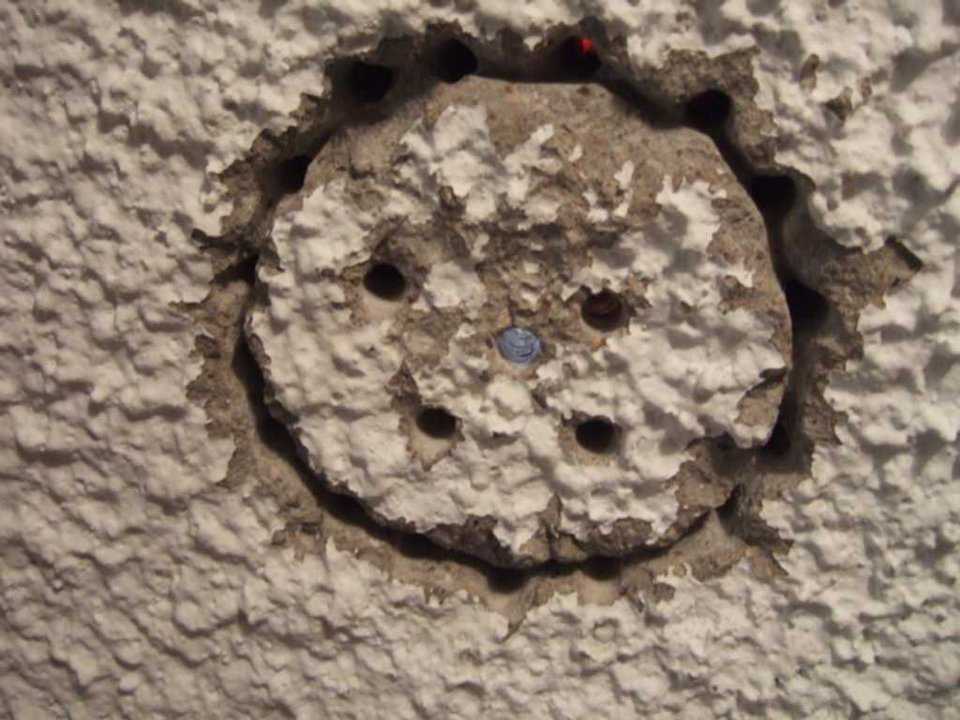
Hole Ready for Chiseling — Holes drilled, ready to be broken or chiseled out.
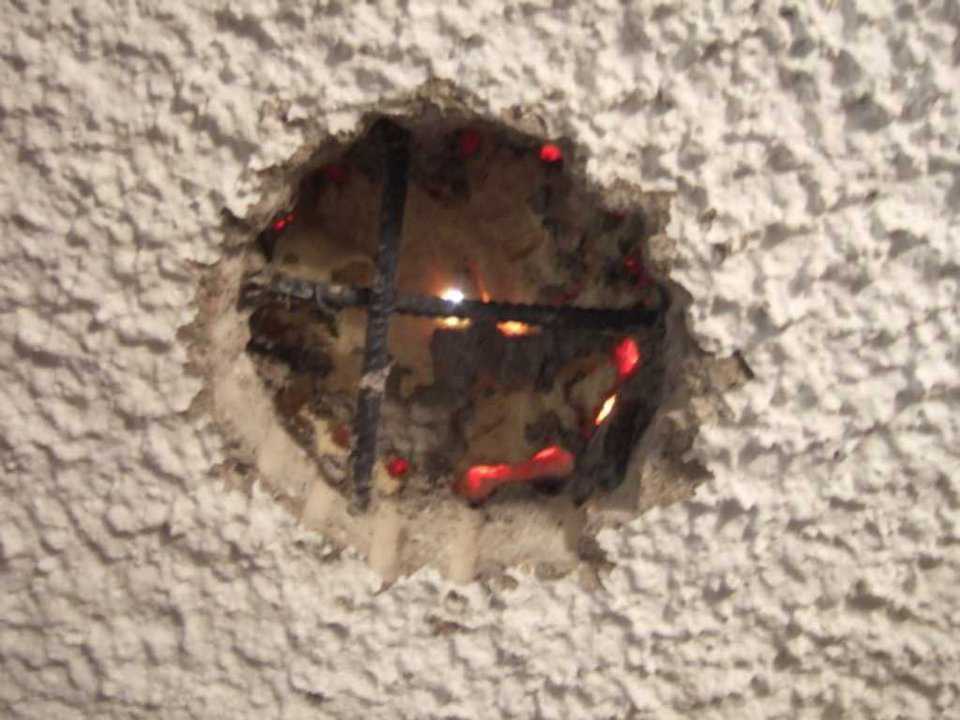
Hole Chiseled Out — Concrete removed. Rebar needs be cut out with saw.
Vent Cap — Sleve is foamed into place, ready for vent cap on roof.
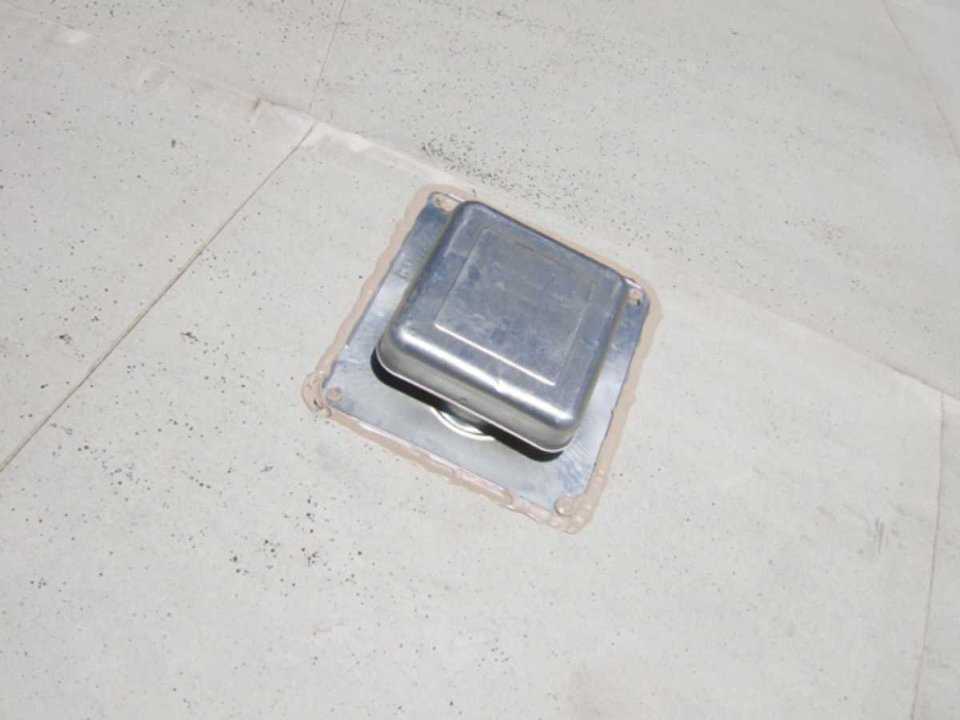
Vent Cap on Airform — Vent cap glued and screwed onto the Airform.
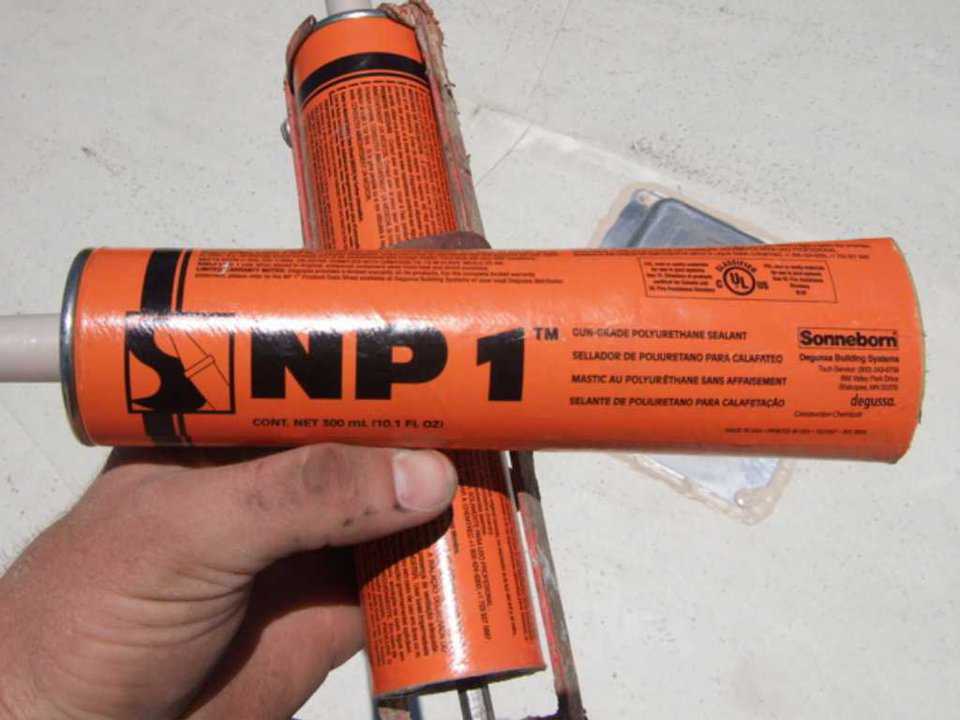
NP 1 — NP1 Single part Urethane caulking used to glue down flange and water proof.
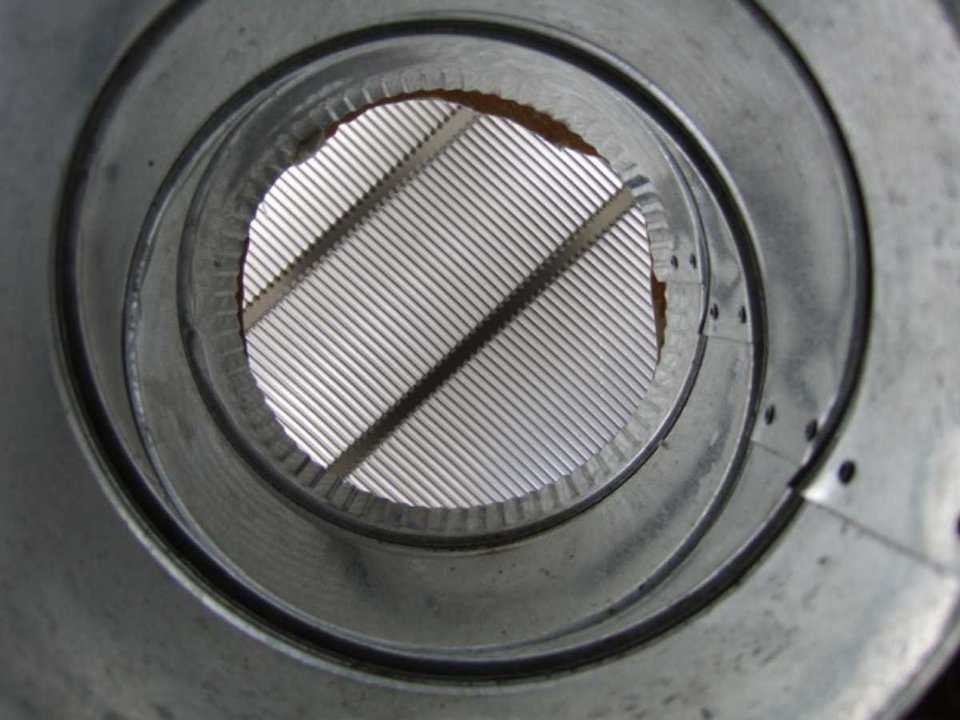
Vent Cover — Looking up from inside after roof vent cover is installed.
Flange to Connect — Flange ready to connect to ERV
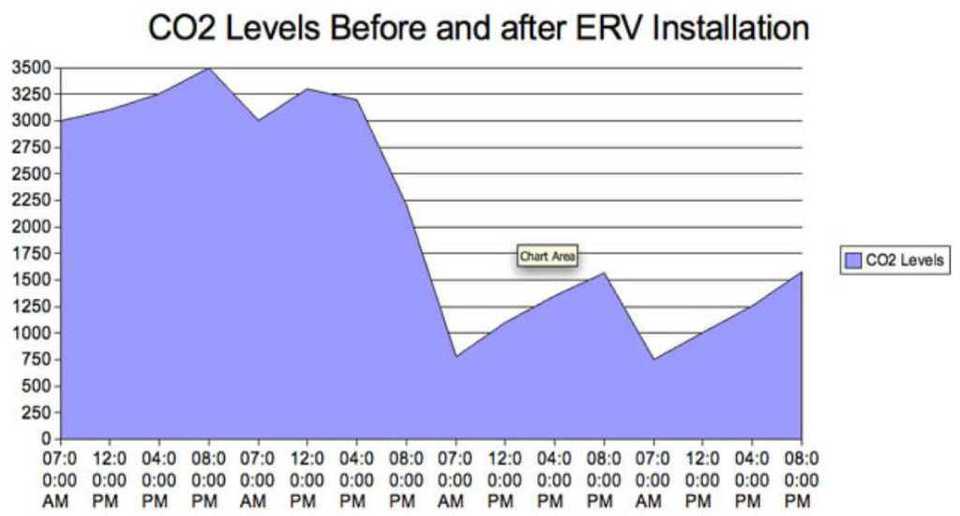
Before and After Installation — The CO2 monitor shows the carbon dioxide levels before and after ERV installation. Covers 4 Days.
RenewAire EV130 ERV — This unit is installed in the home of Judy and David B. South. It has made an enormous difference in the air quality inside the home.
RenewAire EV130 ERV — This unit is installed in Charca Casa.
RecoupAerator Whole House Unit — The RecoupAerator® Whole House Unit is simply the best home ventilation system you can buy.
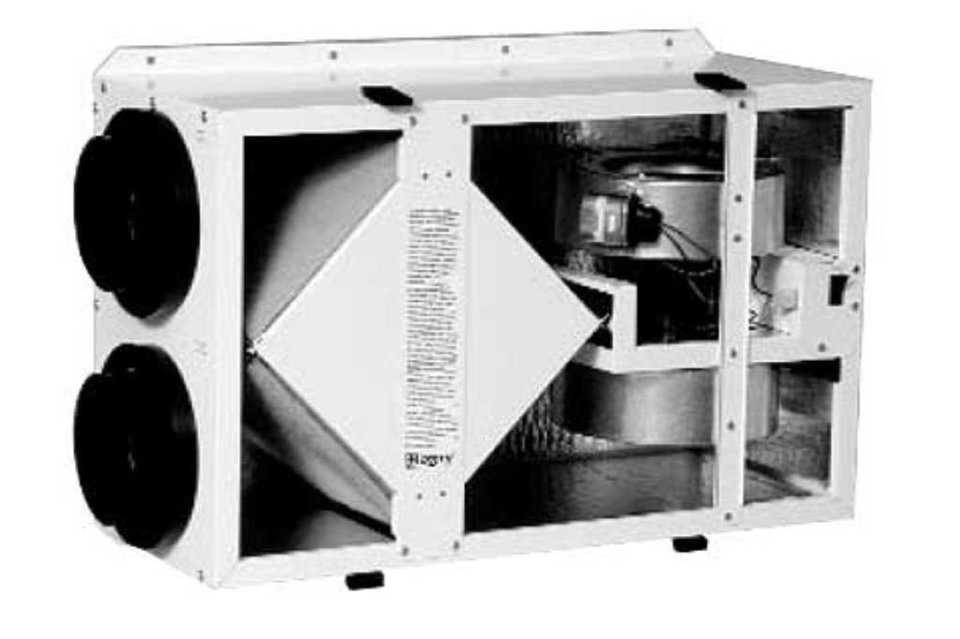
RenewAire EV130 ERV — This machine brings outside “fresh” air into the home and exhausts an equal amount of the home’s stale air.