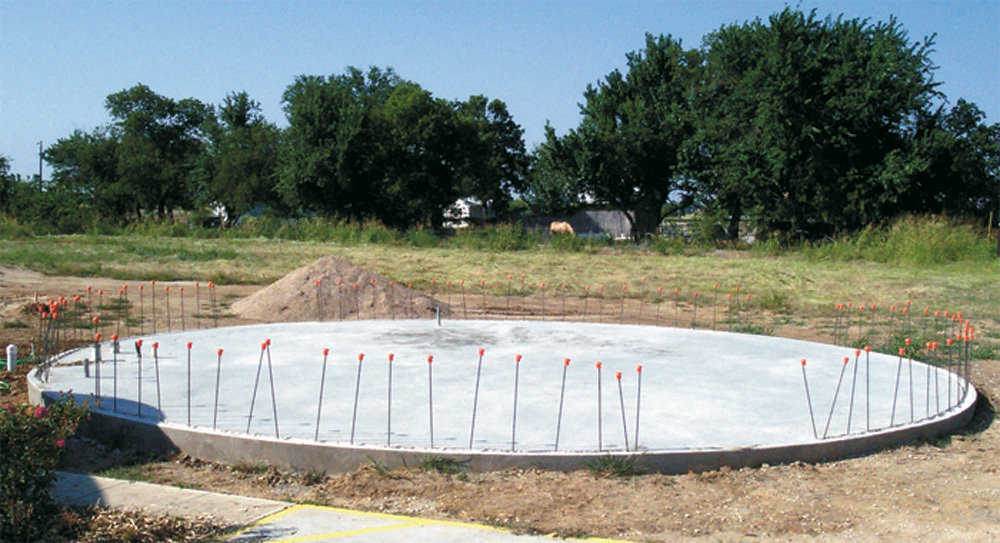
Airform Ready
The Foundation: Using an Integrated Floor System
A Choice
When it comes to building a Monolithic Dome, do-it-yourselfers have a choice: they can contract the concrete work, or with able-bodied help they can tackle the job themselves.
“But,” cautions Vice President Gary L. Clark, “foundation forms set improperly could cause concrete to pour over the forms. So meticulous neatness is needed, and if building on a hill or flood plain it’s best to consult a concrete contractor.”
Since a Monolithic Dome’s strength comes from the building – not its foundation – the dome’s foundation doesn’t require the vertical strength that a conventional structure needs.
In areas with slow ground movement, an integrated floor foundation is used so the shell and dome will move together.
For domes larger than 50’ diameter contact Monolithic for special construction considerations.
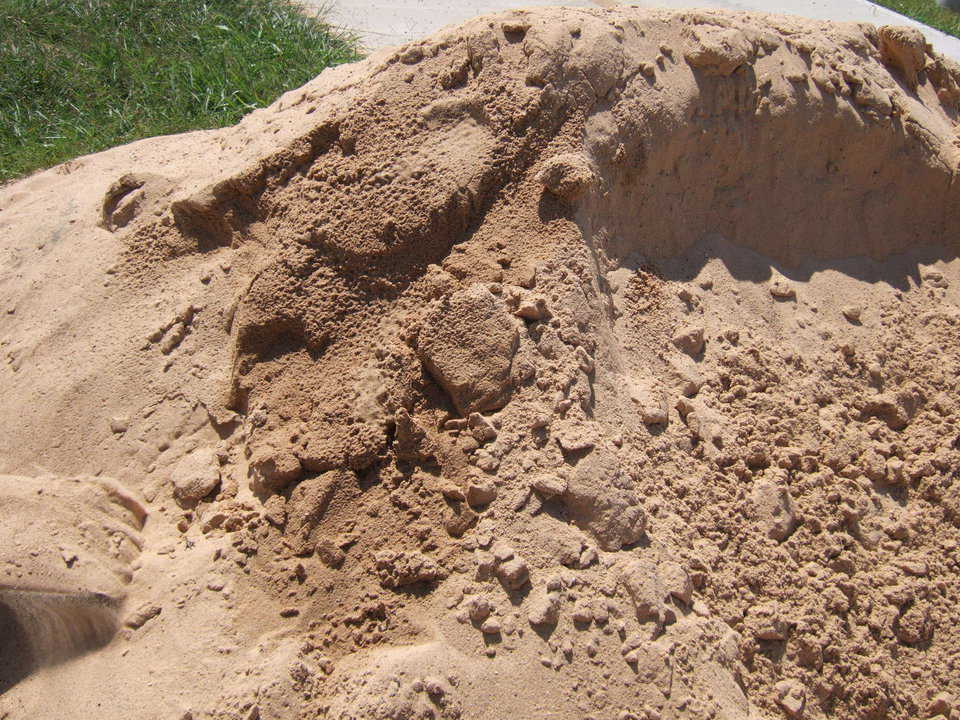
Step 1: Prepare Pad
Use a non-expansive fill such as sand and gravel. (Check with a contractor or supplier for best fill type for your location.) Consider a vapor barrier when pouring any concrete floor. The vapor barrier can be heavy plastic placed under the sand that’s under the floor. Or after the floor has cured, a vapor barrier coating can be applied directly to the concrete.
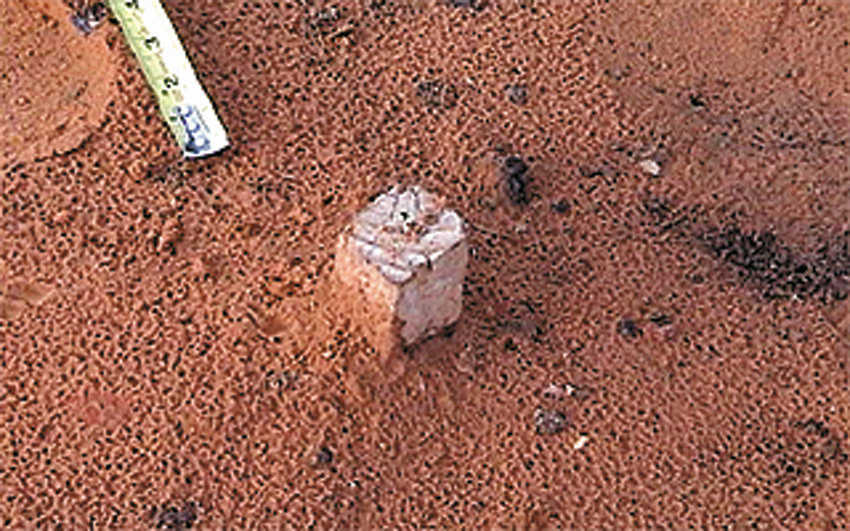
Step 2: Set Benchmark and Level Pad
Set a ground stake as a benchmark that becomes the center point and the spot to call “level.” Level the pad in relationship to your benchmark.
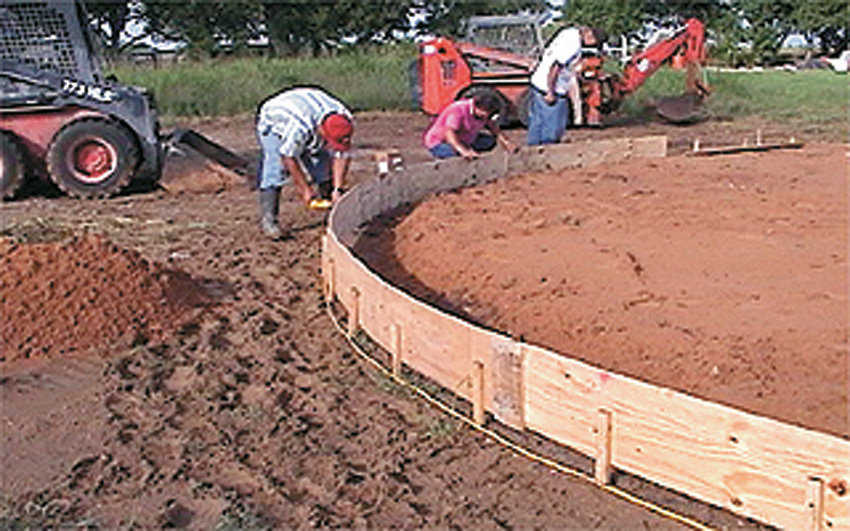
Step 3: Dig Trench
Just inside form boards, dig a trench that will provide: a vertical concrete wall that keeps animals from digging under the house; a reveal so lawn doesn’t come up to floor level; an area for the ring beam. Rebar is placed in this trench. (Depth of the trench is determined by depth needed for frost protection and/or reveal.)
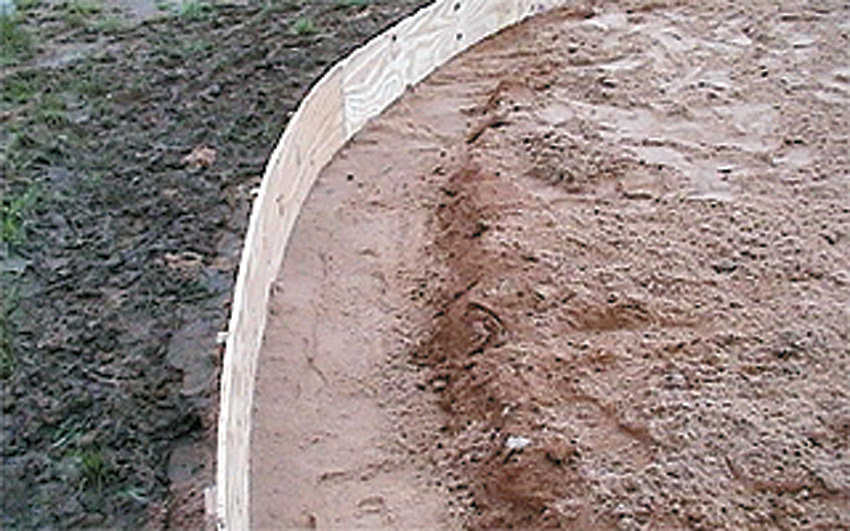
Step 4: Set Form Boards
Place plywood, cut to proper height, horizontally around pad’s perimeter. With screws, attach boards to wooden stakes placed about 12" apart. Check form boards and pad for levelness.
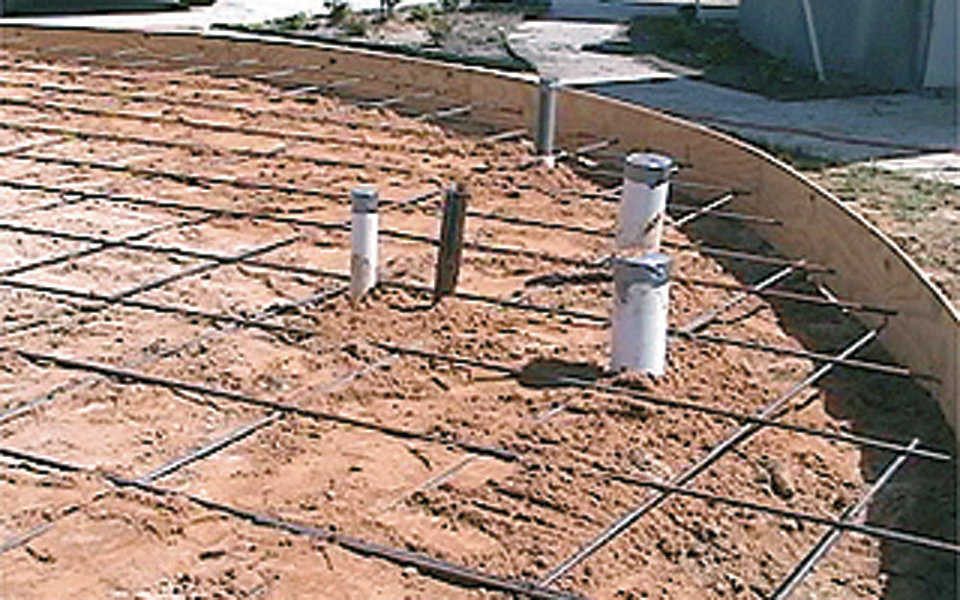
Step 5: Conduits, Piping, Water, Sewer Lines
Utility and communication (Internet, TV, phone) lines can be placed under the slab. Copper pipes, without joints or welds that reduce chances of leakage, are recommended for under-the-slab water lines. Generally homeowners can install these provisions, but some locations require licensed electricians and plumbers. And some areas require a vapor barrier: large piece of plastic that covers the fill and prevents water irrigation through the floor.
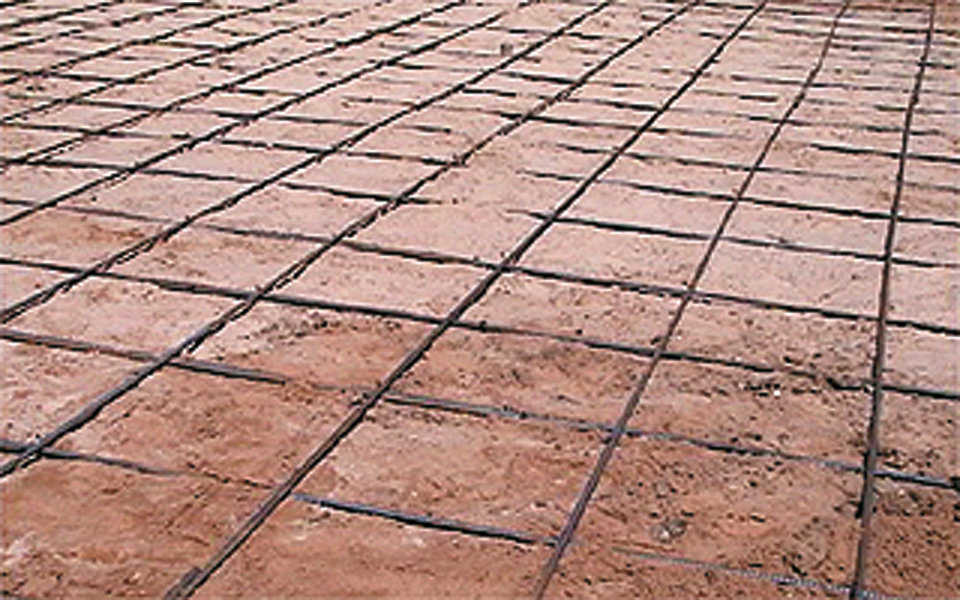
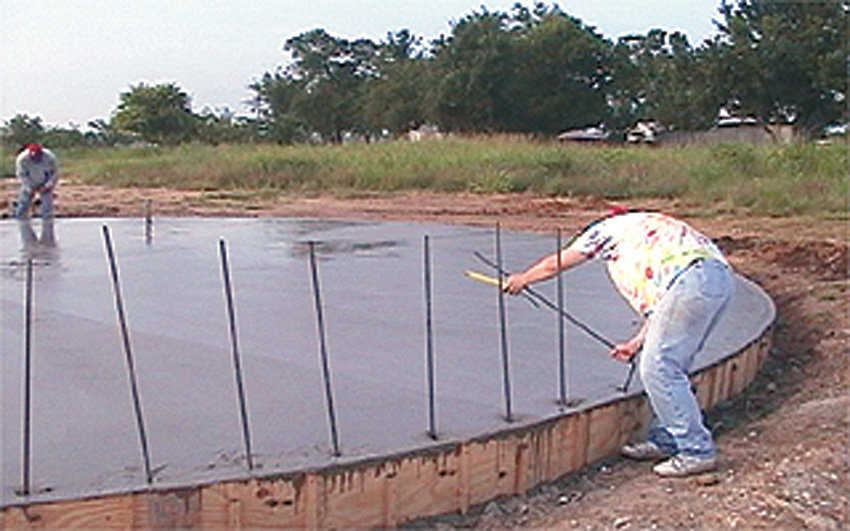
Step 6: Rebar Placement
Dome openings require extra uprights at their sides and additional rebar in the ring beam foundation. Lay foundation rebar in horizontal grid pattern across the pad. Use plastic chairs to raise rebar off pad. In expansive soil, place additional rebar in radial pattern around perimeter. Engineering specifications and dome size determine rebar amount and size.
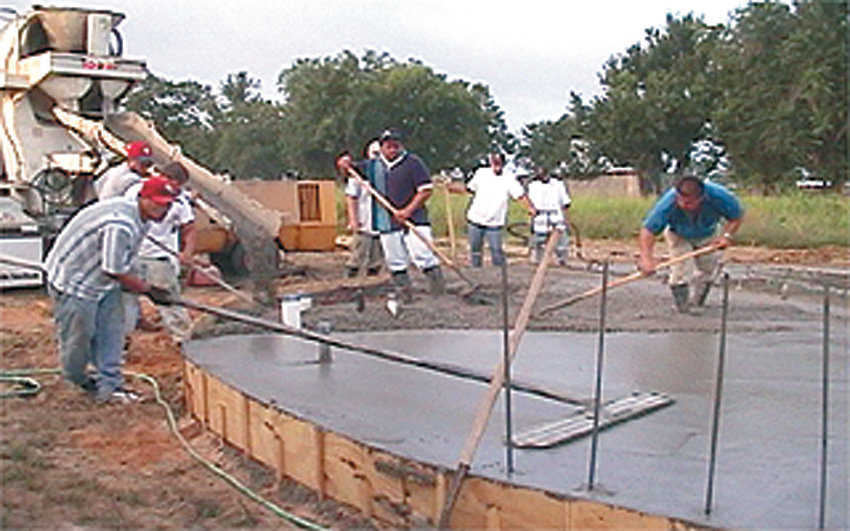
Step 7: Pouring Concrete
Hire contractor to mix and pour or have able-bodies help you. Cover the floor with a plastic sheet, or use a hose to keep the concrete wet for a few days, so it will cure properly.
Step 8: Measure for Uprights
To mark placement for uprights, after the floor is poured and troweled to desired smoothness but still wet, make Xs in concrete, 5" from inside of form board and approximately 10" to 12" apart around perimeter.
Step 9: Set Uprights
At X wet-set into foundation’s perimeter pieces of L-shaped rebar approximately 4’ long.
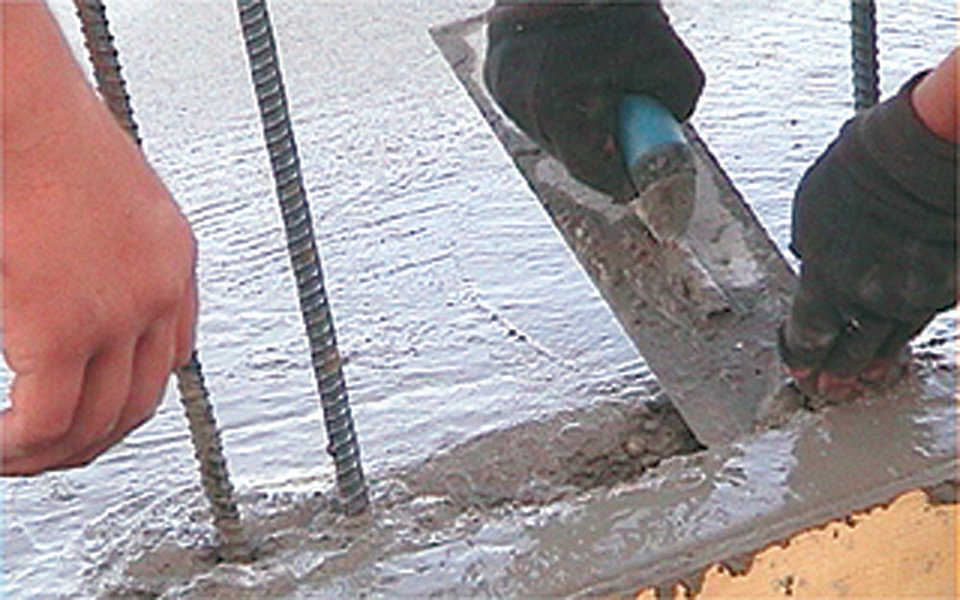
Step 10: Prepare Keyway
Keyway is a groove dug out of the wet concrete that’s approximately 1" deep and 2" to 3" wide; it surrounds perimeter where uprights are placed and locks dome shell to foundation. After uprights cure into the concrete, bend them parallel to foundation. Cover entire floor and bent uprights with plastic. You are now ready to attach the Airform.
Note: Keyway can be eliminated by using a rough surface like that created by a notched trowel the width of the shell for the dome to sit on.
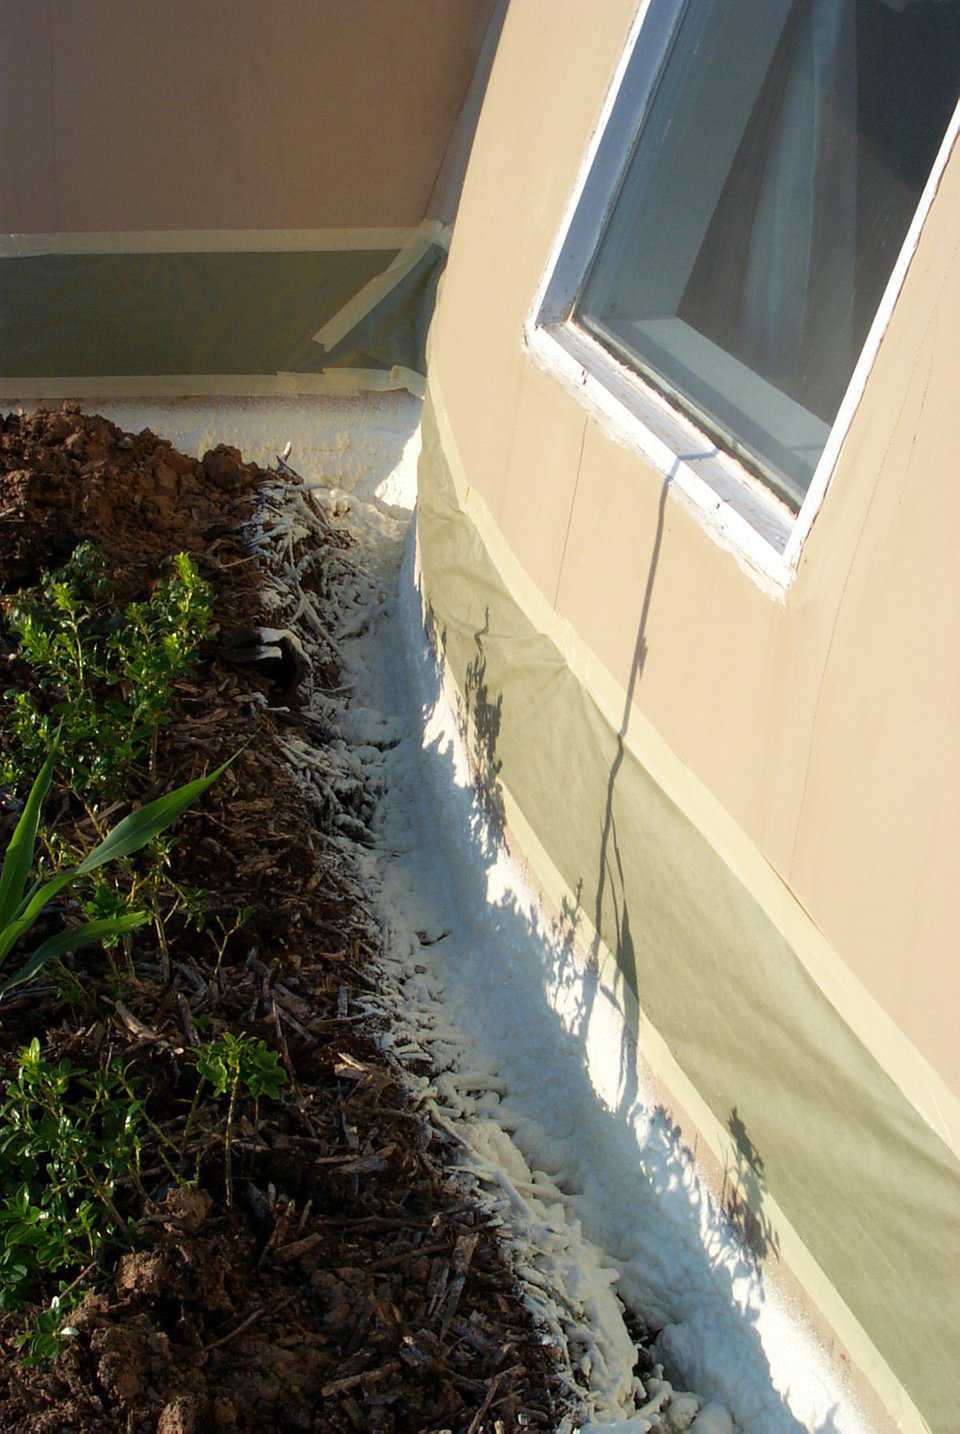
Step 11: Thermal Break
After the dome is constructed, a thermal break may be advisable. This can be 2" of Styrofoam or 1" of polyurethane foam applied to the exterior surface of the footing wall, then coated, backfilled or plastered.
Reprinted from the Roundup-Winter 1999
Step 1: Prepare Pad
Step 2: Set Benchmark and Level Pad
Step 3: Dig Trench
Step 4: Set Form Boards
Step 5: Conduits, Piping, Water, Sewer Lines
Step 6: Rebar Placement
Step 7: Pouring Concrete
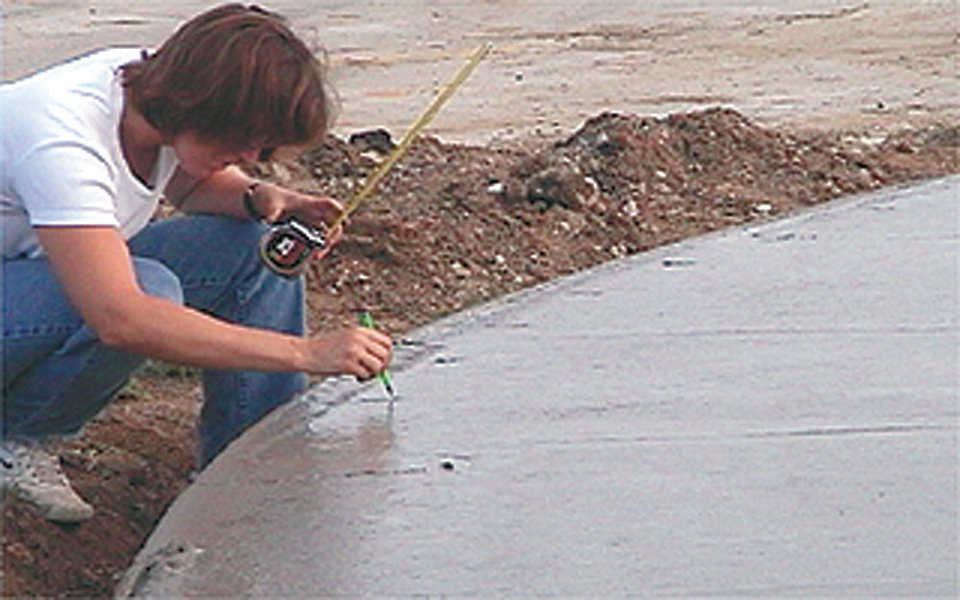
Step 8: Measure for Uprights
Step 9: Set Uprights
Step 10: Prepare Keyway
Step 11: Thermal Break