The Dangers of Low-Profile Monolithic Domes
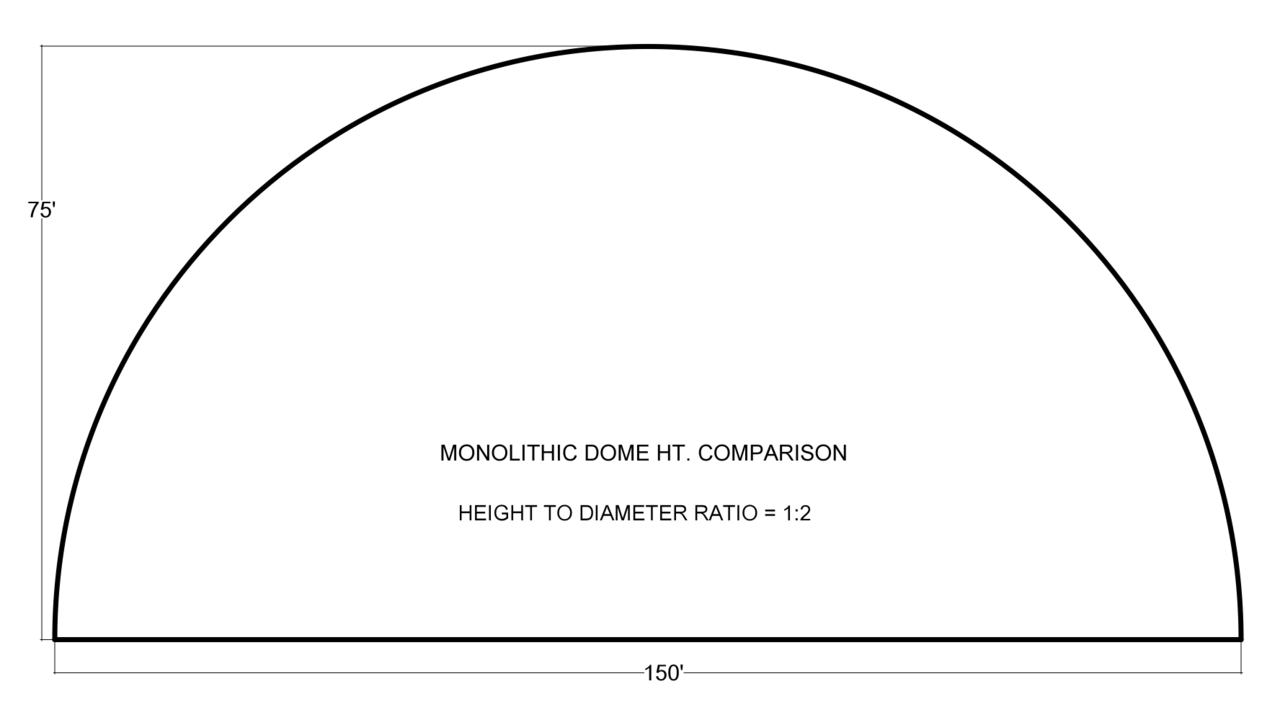
DOME PROFILE 1:2 – The half sphere shown here is 150’ wide and 75’ high. This profile is ideal for bulk storages with the capacity to hold tremendous loads of fertilizer, cement, etc. The height helps hold the loads and makes putting product in and out of the dome relatively easy. Half spheres can be built on vertical walls, but you get the most for the least with the spherical shape without the cylindrical stemwall.
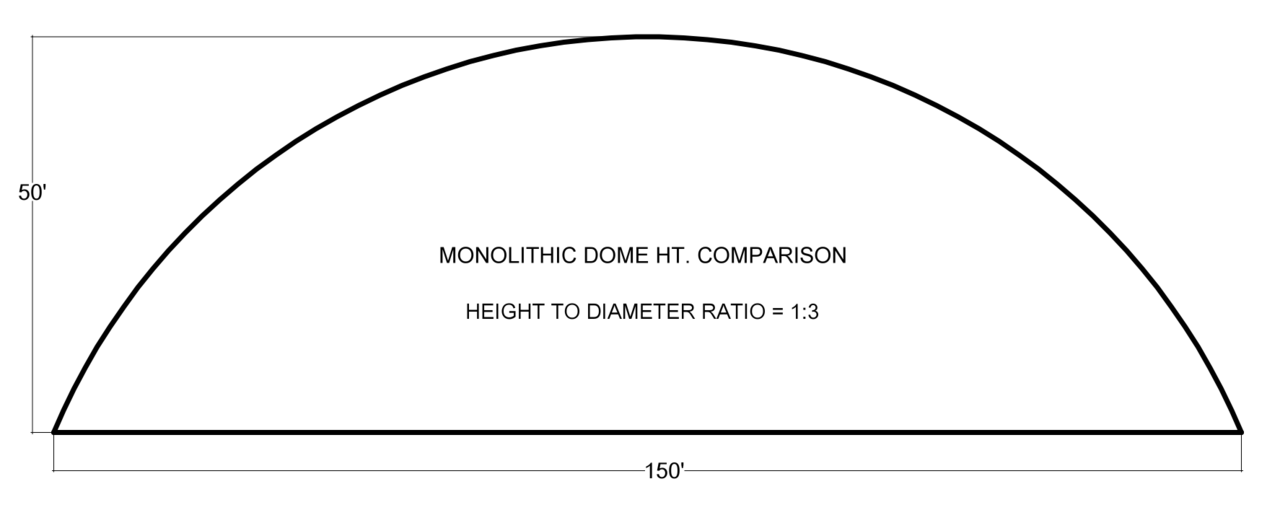
DOME PROFILE 1:3 – This profile has a height a third the length of the diameter. The 1:3 profile shown here is 150’ wide and 50’ tall. This profile makes a spectacular arena. A second floor is possible with this profile and the walls are close enough to vertical, you don’t lose much space around the perimeter. Most important is the fact that the surface area is quite large. Surface area is like a battery and what helps hold the cost of heating and cooling down in a Monolithic Dome.
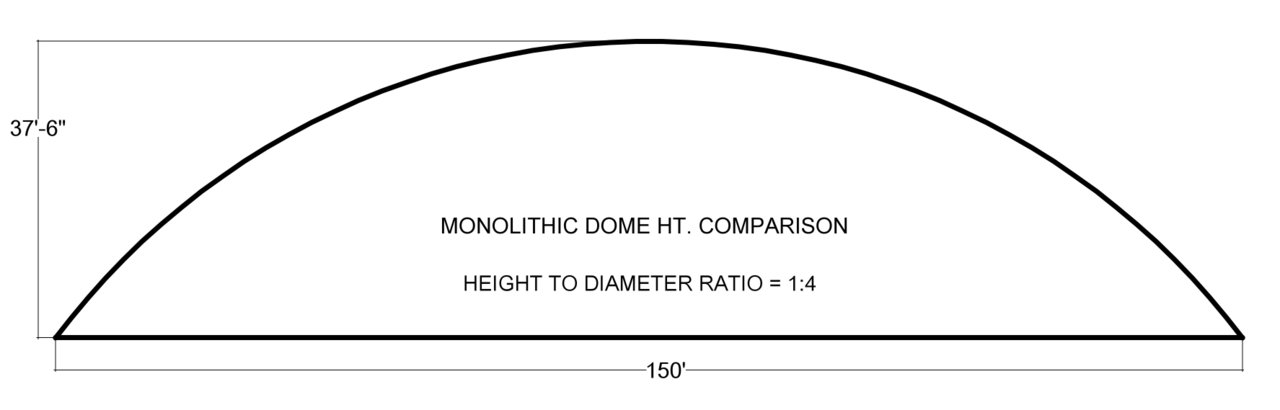
DOME PROFILE 1:4 – If we go to a 1:4 ratio, in this case a dome with a 150’ diameter and height of 37.5’, we have the least expensive roof to put over that much floor area. There is still enough height that for many buildings, there is walking space around the perimeter. The 1:4 profile gives you the most bang for your buck with the large surface area acting as a thermal battery.
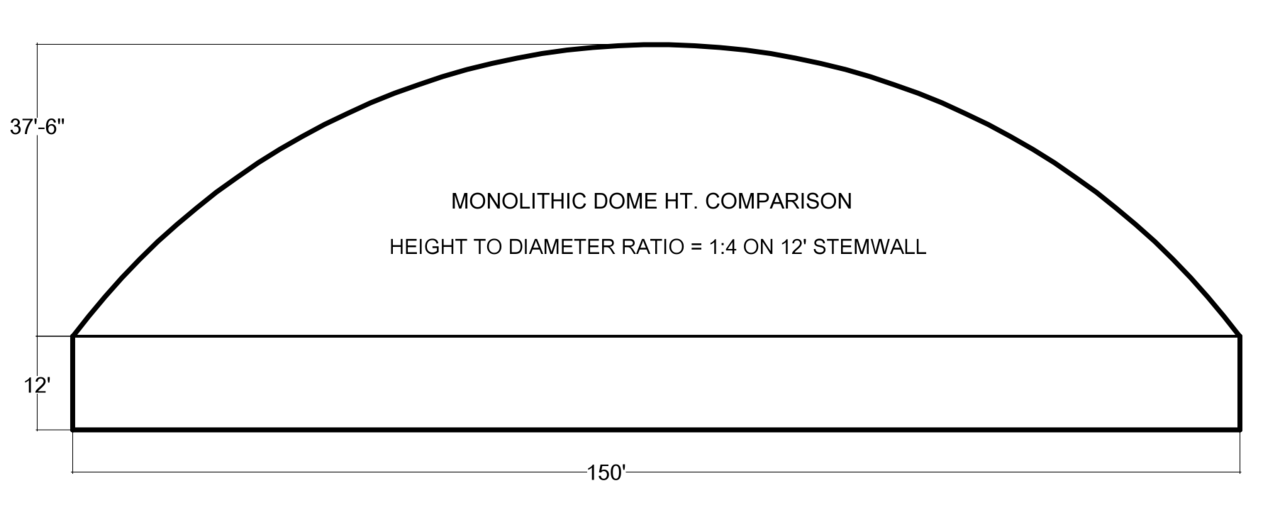
DOME PROFILE 1:4 on Stemwall – The 1:4 dome profile can also be built on a stemwall for a more conventional appearance.That thermal battery is extremely important and even though it rises higher than some buildings, it works and works well.
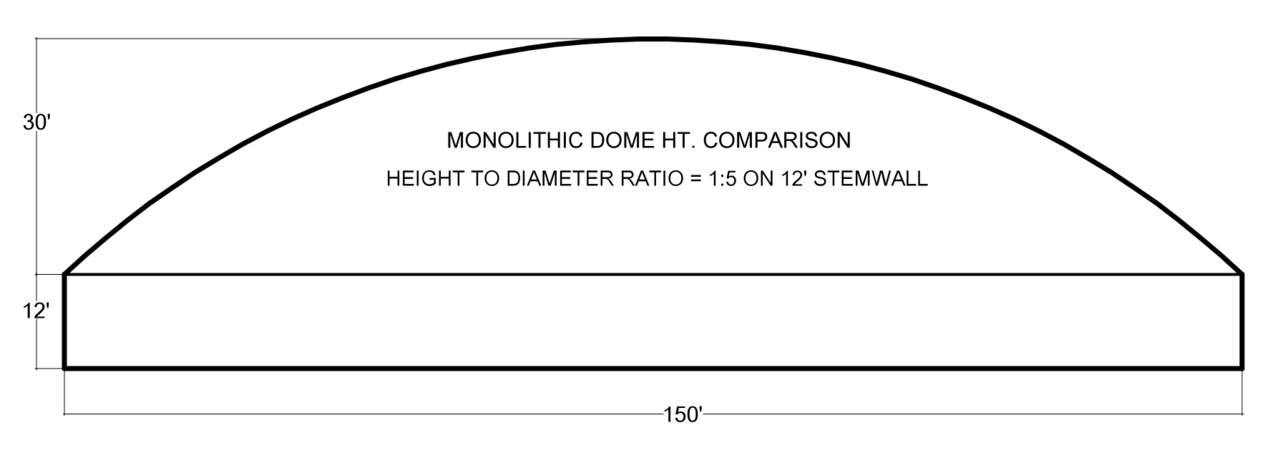
DOME PROFILE 1:5 on Stemwall – The 1:5 ratio dome is low enough profile it probably needs to be on a stem wall. The stem wall can be as low as nine or ten feet or it can be as high as forty or fifty feet. The stem wall is important to some architects and some owners, although it is an expensive way to get height. However, the 1:5 ratio on a 12’ stem wall makes an extremely good basketball facility, hockey stadium or small arena. The surface area of the roof is still large enough to make that all-important thermal battery.
(Note – A 1:5 ratio and a 1:4 ratio covers the same amount of floor area for the same amount of money. They both work.)
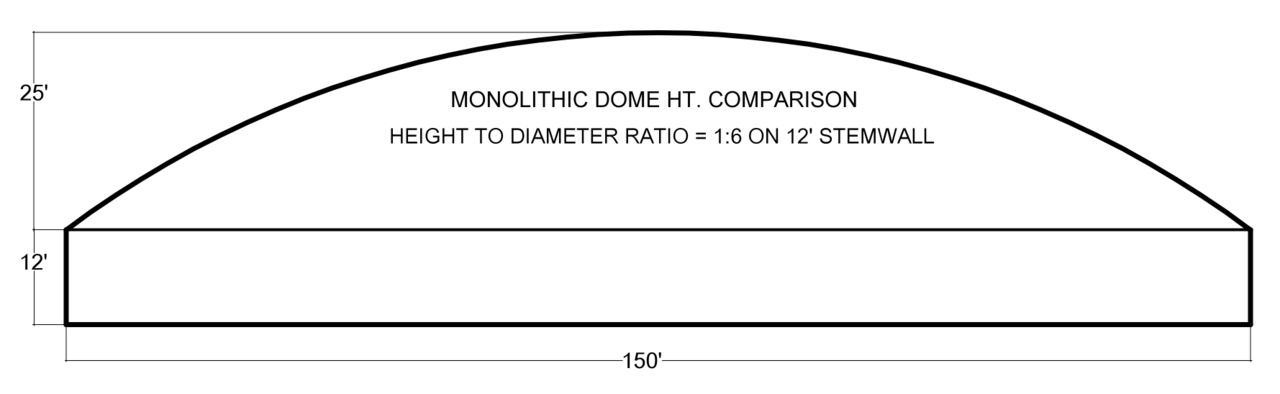
DOME PROFILE 1:6 on Stemwall – The 1:6 ratios shown here has a diameter of 150’, dome height of 25’ on a 12’ stemwall. This ratio increases the outward thrust at the edge of the dome which increases the pressures and the chance of distortion. At 1:6, we move into dangerous construction, especially when using an air-formed membrane.
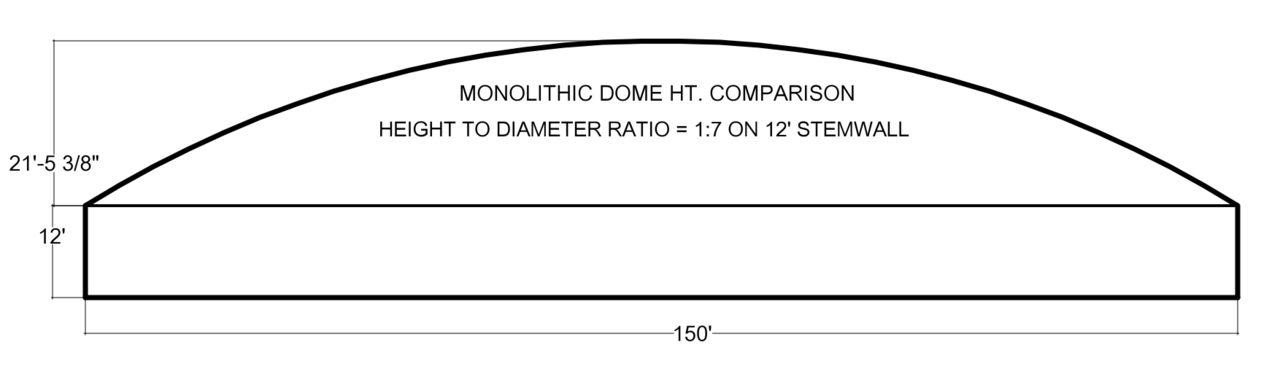
DOME PROFILE 1:7 on Stemwall – We are even further into the dangerous construction ratios at 1:7. The 1:7 ratio shown here has a diameter of 150’, dome height of approximately 21.5’ on a 12’ stemwall. The air-formed dome is sprayed in place and I don’t care how careful the sprayers are, they can tend to distort that shape. If that shape is distorted the strength of the building is compromised considerably.
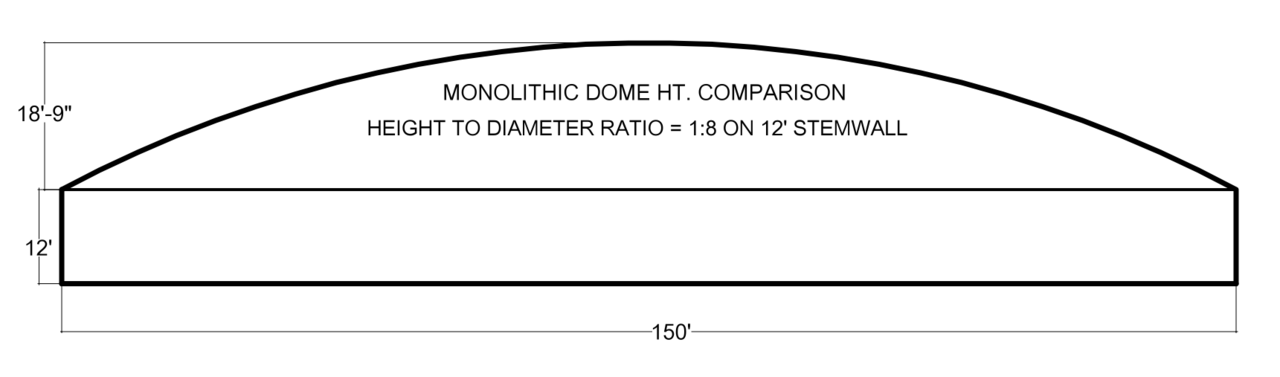
DOME PROFILE 1:8 on Stemwall – At 1:8, construction becomes extremely dangerous. The 1:8 ratio is pure foolishness. It works where non air-forming is done because the application of the concrete is not going to be a big deal in the shape, but with the air-forming it is a big deal and it is extremely important not to play with it.
(Remember, as the side thrust goes up, the pressures go up and the chance of distortion goes way up.)