
Chuck Peters’ Cloudome — This beautiful Monolithic Dome home in Cloudland, GA is a multi-level, prolate ellipsoid. Its Airform measured 60′×37′×27′. (Chuck Peters)
Thinking Outside of the Circle
Time of Change
After a wonderful evening of music and friends in town, one cannot fathom the thought that when you return home, your home and all your memories, possessions and thoughts of jumping into a warm bed are all in ashes, still smoldering. My neighbors stopped me at the front of the driveway, which is a mile into the woods, to warn me. But it doesn’t really hit you until you see it with your own eyes. Not pretty, and the feeling of this loss did not even register as real at the time. My first thoughts were of the animals; they all showed up later, after hiding in the barn. Only exception was Blu, my dog, who was in the middle of it all, helping the firefighters.
My neighbors followed me to the house to see how I would handle it. It wasn’t fun but reality is reality and seeing that I was okay, or at least as okay as a person could be under those circumstances, they left. Both were exhausted from being at the scene for so long with the fire department. I live in a remote area and by the time my neighbors saw the glow and the fire department got there, all that could be done was to contain the blaze. They told me all the trees within 50 feet of the house were on fire, and the 500-gallon LP tank was smoking and ready to blow. It was very hot, but it didn’t blow, probably because a leak in the gas line in the house had dissipated much of the pressure in the tank and was feeding the fire. The fire was so hot it actually melted my cast iron bathtub. After my friends left, I sat staring in disbelief at the destruction.
Now it was a matter of what to do. As luck would have it, I had built a shower house, as well as a 30-foot yurt to be used for my stained glass studio and for workshops.The next few weeks were spent salvaging what had survived. Not much, it turned out. Almost everything was unrecognizable. However of all things, my grandmother’s silver angel, a Christmas tree ornament my mother gave me, survived. There were also a few rings and some melted coins, but that was about all that was left. After clearing the site, it was time to move forward and think about a new home.
To Dome or not to Dome?
That was my question. I had to make a decision about what to rebuild. Should I go with the traditional stick-built home or look at the alternative building techniques, which were becoming popular all over the country? I considered straw bales, earthship, earthbag, and several other options that would yield what I really wanted: an energy-efficient home. But these techniques require hands-on intensive labor which I had no desire to commit to. I was also unfamiliar with the processes at the time and wasn’t quite sure how to approach learning them. And then there was the time factor. I could live in my studio and be comfortable, but taking five years to build was not an option I wished to pursue.
My background is in design. I have always been an artist, designer, builder and had the perfect setup to build my own home. So what was I going to do? I had the land, the insurance money and an imagination, with the skill to back it up. I had seen a wonderful type of construction known as thin-shelled domes. Some friends of mine had a village of these domes I had seen 10 years before called the Farside Community in northeast GA. Other friends who were skilled in feng shui, the ancient Eastern art of placement, had also mentioned a school called the Monolithic Dome Institute in Texas. I went to a party and met a wonderful structural engineer, Greg, who was building one of these domes. My interest sparked; I went to see what he had done and was impressed, knowing he was a structural engineer. After checking the Monolithic website, I decided to research for more details on the process of thin shelled construction. Being an artist with construction craft skills, this process intrigued and stimulated my imagination. I signed up and by the time of the class in August, I had my preliminary plans in my briefcase, just in case I decided to build this dome. Having gone through an earthquake, a tornado and now a fire, this seemed the best option. It seemed to me that with all the extreme weather we are having everywhere this might be the only option.
Off to Texas
To say the least, visionary would be the best description for the Monolithic Dome Institute. Driving down I35, you come face-to-face with a dome known as the Caterpillar, not the bulldozer type but a 300 foot, multiple-dome, caterpillar bug, which I later learned is where they build the Airform structures, the first step in this type of construction.
Technique, safety, research and experience were exceptional at the Institute. They made you feel like part of a family, a family of visionaries. People from all over the world made up the class; I felt honored to be one of them. This is a new industry and one can only teach through experience. Sharing their 20 years of mistakes and victories along with the vision of affordable, almost indestructible housing, the Monolithic Institute and its people truly are visionary and beyond the box in housing methods and construction.
Many others are doing the same with thin shell construction, but my hat goes off to those who see the future and want to share a vision of sustainable, affordable housing that will last for many years. It is time for a change in our housing modality, especially along the coast.
Ironically, during that August of 2004, the Monolithic Dome would be put to the ultimate test. During our week-long class, the largest hurricane in our history decided to see if the Monolithic Dome would live up to its claims. Hurricane Ivan landed in Pensacola Beach half way through our class. One of the most strikingly beautiful domes had just been completed on that beach and FEMA allowed news crews to stay there. It was the only structure they allowed anyone to stay in. The Seiglers, who had two previous homes destroyed in hurricanes, researched domes and received a partial grant from FEMA to build their Dome of a Home. After the storm, we got the news that it was the only structure that survived. We know the tragic rest of the story of the Gulf Coast and New Orleans. The Seiglers’ design was one of beauty and function, and I used this concept for my design from the beginning. My impression of most domes was that they were dark and very protective, but that natural ventilation and light would be factors for me, and with the large opening in the front I felt this satisfied those factors, and I was correct.
Committing to the Dome
I was concerned about affordability, and about my ability to actually complete the project. But I decided I could do it. Not knowing the availability of construction crews who were familiar with this method, I moved forward in faith with final plans, and began clearing the area for the dome. Some call it Zen or the flow of things but before I knew it, we were pouring the foundation. My friend Greg found a company who specialized in concrete spraying for large water tanks. They had shotcreted his dome and as luck would have it, they were between jobs when I was ready and wanted to make some extra money. A 14-year journeyman certified in overhead spraying of shot crete headed the crew. They knew what they were doing.
The day before they arrived I had to make the decision of where to place the dome’s front. I knew I wanted southern exposure, and the view was also a consideration in placing the dome. It turned out that the ideal orientation was about 4 degrees from due south, leaning toward the west. Ironically a Master of Feng Shui (the oriental art of placement) with whom I had consulted finally sent me her suggestions, which arrived three days after we set the foundation. Her comment was that it should not be placed directly on a north/south angle but, instead, a few degrees to the west. Whether it was Zen or luck, that’s exactly what I had done!
The crew showed up on November 11, 2004 (11/11), and the journey began. Within two weeks the concrete trucks were arriving. This says much for the crew. Being skilled in foundation forms on a large scale, they applied the same treatment to my foundation, making it exceed the required specifications. In fact, they used leftover number 4 rebar from their last job, making the foundation far above specs. Also, being used to circular construction, they had to stretch a little to accommodate my design, an oval. People think of domes as circular, but with this method of construction one can do multiple domes in any shape one chooses, as long as the shape does not compromise the Airform’s capability to inflate, or the final dome’s structure.
Computers are great, but my background and skill as an illustrator and designer, meant I was more comfortable with doing the floor plans the old fashion way, with pen and paper. During my many trials I used the old method of two pins and a string, instead of using a template. Applied on a larger scale, this worked perfectly. Instead of pins and a string, I used stakes and a 300-foot measuring tape, which was both waterproof and non-stretching. The exact measurement on the tape made it perfect for this application.
The final design called for a prolate ellipsoid and started with the elliptical shape of an oval. Prolate ellipsoid sounds like a spaceship, which is not too far off. My background also includes the ancient science of sacred geometry. This is the geometry of patterns and dimensions found in nature, a system used by the ancient Egyptians to build the most durable and still existing structures in the world: the pyramids. This art is preserved and survived through the Knights Templar and Masons. Ancient cathedrals, temples and even the layout of our Capital in Washington D.C. all are examples of this sacred geometry.
The phi ratio is one of the basic dimensions of nature: 1.618. Expressed here to 3 decimals, it continues on to infinity or divides into infinity. Only a few numbers do this, and they’re known as transcendental numbers. I apply this to everything I can when designing. Using this dimension in structures creates a feeling of balance that is in tune with the surrounding natural environment. In other words, in balance with nature.
To apply these dimensions, one only has to start with any length, 1 inch or 1 mile, 15 feet or 18 feet, it doesn’t matter. If your beginning length is A, multiply it by 1.618 or divide it by the same number and you will have what is called the golden mean ratio between the length compared to the width. You see this dimension every day in your life, especially in nature or natural objects. One in particular is “the egg”. Some say it is one of the strongest designs in nature. And that is what a prolate ellipsoid is: basically the shape of an egg.
The First Steps
The beginning of the process is the foundation. During this time of laying the foundation, what is known as an Airform was being built at the Monolithic Institute. This is a form of PVC-coated nylon or polyester fabric. It creates a material that has almost no stretch, cannot be ripped, and is durable for 10 years if it’s exposed to ultraviolet light from the sun. Monolithic has devised a method to build almost any shape or form out of this material. Creating the foundation, one needs to take into consideration that an Airform will be applied. To do this you need include a 6" to 8" continuous rise around the perimeter of the foundation. Once the foundation is cured it is time to apply the Airform.
During the foundation process you will execute the rebar application, by tying in rebar on a vertical around the perimeter wall that will eventually tie into the dome rebar. Before rolling out the Airform, you have to bend this rebar down and cover it to prevent any tears in the Airform when it is placed on the foundation. When designing, the perimeters of the foundation should match the base perimeters of the Airform for a tight fit. This is a very important point in order for the Airform to be secure to the foundation.
A rope is designed in the base of the Airform and once laid on the foundation rim a metal strap is then applied with concrete screws. After this, an air lock chamber entrance and the inflator fan are attached. Then it’s time for “the moment of truth.” Within two hours after starting the fan, I had an inflated, waterproof structure. Pretty amazing to watch – going from a flat area to a 2-story structure. As every “Domer” knows, it is a “wow” moment. I designed the airlock chamber to allow one man and a wheel barrel to have access. It worked great, but it is possible that the fluctuation in air pressure from the inside might have an effect. With 24 lb of pressure per square foot, it was impossible to open the door into the dome. I felt the fan could handle the pressure change in the dome area and the flux of pressure would not be a concern.
However, implementing a small hatch door on each of the airlock doors to allow the air pressure to build up slowly, as seen at Monolithic, allowed for an easy exchange of pressure, allowing you to be able to open the door. The chamber size came in handy when we had to remove the over-sprayed concrete, which I used for a drainage barrier around the back of the dome, in which I eventually had plans to berm.
Next step: Enter the Dome
Through the airlock chamber where one cuts the material to the entrance, air escapes into the chamber; when entering the dome one has a feeling of awe. The expanse is incredible, but when viewing a dome from the outside you only see a little less than half of the volume. From the inside, one experiences the whole structure.
Now that the Airform is inflated, the next step is to apply a liquid adhesive on the interior to allow the foam to stick when sprayed. Experienced people wearing protective gear should only do the foam application. Concern for breathing carcinogens when spraying is a factor not to be ignored. However the toxicity quickly dissipates once the foam is set. Also, to allow for ventilation in the dome, I created an exit hole at one end of about 8 inches across to allow the air to escape and ventilate.
The fan I was using, an SE3 grain elevator fan adapted by Monolithic to be adjusted for pressure, had more than enough power to keep the 24 lb per square foot expansion going. It seemed to take about 30 minutes to clear most of the interior air.
Spraying foam in a way that ensures an even thickness and surface is almost an art. One inch of foam is then sprayed throughout the interior surface of the dome. Then, 2" square metal plates that are stamped to create small, protruding sharp edges are applied. These plates include a welded 8" wire protruding from them that is then applied approximately every 12" to 14", both horizontally and vertically. These are applied throughout the surface of the one-inch-thick foam layer. The protruding sharp edges allow for the metal plate to stick to the foam. I also used a 1/2" by 12" PVC pipe, marked off in 12" spaces, to help with the application of these metal plates. Once all of these are applied, you are ready for the second round of foam. Depending on the skill of the applicator, a 2"-thick additional surface is then sprayed. Now the interior of your dome looks more like a pincushion from the inside.
Now for the rebar
Monolithic will help in determining the amount of materials you will need, according to your design. Surface is the main factor and the estimates I found were pretty accurate. With the skills of the crew we had the rebar hung within two weeks.
Most of the rebar was under the Airform before inflating. However, more was needed and I took a saw horse and a 6″ × 10″ PVC pipe and inserted this in a small cut in the entrance way to the dome, allowing for easy insertion into the dome and preventing any unwanted holes to poke into the Airform. This lets you use the whole 20 foot length of the rebar.
Time for Shotcrete
Before I knew it the concrete truck, the concrete pumper and the air compressor were onsite. Not wasting time, we started to spray the concrete. Within another intense two weeks we had most of it sprayed. The equipment was for major jobs, and I felt the finish work should be more controllable. Again as luck (or Zen) would have it, a friend does concrete-sprayed swimming pools and fountains with a smaller concrete sprayer. Before the first concrete could dry, we were applying the finished layer.
On the final coating and finishing, adding color was an option I wanted to try. Unfortunately, using dry pigment meant the color didn’t blend well with the different batches we had used, and I ended up spraying with a concrete stain. This gave the interior a clean, even finish. Now it was time to sit and wait while the concrete cured for at least 30 days while still under pressure.
Opening the Dome
What a treat when you first turn off the fan, and the noise that had been ever present during construction stops and what a scare thinking the whole thing might collapse when you do, which it didn’t. Now you take the chamber off and cut the material so you have your first door. Wow! Sunlight in the dome. Next, you create the opening that will be the front. Scaffolding and a sharp sawzall blade did the job in one day. “Let there be light in the dome.” There it was: “Cloudome” and it looks like a big amphitheater. With the frogs chirping in the pond, it resonated with incredible sounds.
Time for the Carpenters
Again the Zen kicked in and my neighbors, who were all accomplished, log cabin builders, stepped into the picture. The first impression of the lead carpenter, John, was, “I don’t do boats.” It took a while to convince him it wasn’t much different than a log cabin, with all the strange joints. Ninety percent of my design was 90-degree angles. We had most of the wood milled at a local mill. We used posts from the pines that were killed during the fire, and all of the doors, windows and flooring came from salvage places around the area.
Saw dust was flying and before long we had the interior framing, flooring and windows in. Again I used the principal of sacred geometry where ever I could. Some designs create themselves and this evolved into each floor being on its own level. Some friends say it’s like what happens when you are old and can’t walk anymore. I hope that never happens, but each floor other than the upstairs is only 3 – 4 steps, allowing for an easy ramp angle. As for the upstairs, I have incorporated major bolts into the ceiling to allow for an elevator to have access to the bedroom, kitchen and living room. Stairchair elevators are an option with the other parts of the house. Dried-in, the exterior siding was next.
During the waiting periods for the concrete and the carpenters, I milled my own trees of white oak, which had been curing during this time. It looked beautiful but needed sealing, so I used a redwood sealer and the results were beautiful. This design, with the dome’s front opened up, was not totally resistant to extreme weather, but allowed for passive solar to enter, as well as light. Facing south, the whole dome is well lit during the day and I never have the need to turn on any lights. In the winter I get about 20% of my heating from this and in the summer a 4" overhang on the dome prevents the sun from hitting the siding, thus keeping the dome cooler.
Now for the finish work
Being a carpenter and a perfectionist, I preferred to do the finish work myself. As most know, it takes awhile, especially when you’re working solo. But I wanted it right for me. Friends showed up in mass to help with the stacked rock fireplace and it is truly the centerpiece of the house. It’s based on the Russian Fireplace design with a few additions. Raised off the slab about 3 feet, the floor for the wood-burning stove also has a vent. With fans underneath in the 3-foot crawl space, they act as a heating and cooling element moving the air under all of the raised first level flooring. Since heat rises, it is a natural micro draft. I designed a 3-inch gap on all the floors butting up against the concrete to allow for this micro draft to rise up against the concrete and keep the warmth throughout the thermal mass.
I also have a small wood-burning stove on the kitchen level known as a Yodel. It’s a very efficient stove that actually heats the dome most of the winter. In the design of the chimney I created an opening above the Yodel to eventually allow for a ceramic oven over the stove for baking and cooking. Presently I do cook on this using a cast iron Dutch oven, and even keep water on it all day for tea. In extreme winter weather I have the larger wood stove, an LP gas heater in the kitchen when I am not here for an extended period of time, and also a heater and cooling air conditioner in the upstairs bedroom. In the summer these fans keep the air circulating, but when there is high humidity I need to run the air conditioner or dehumidifier. Over all I am pleased with the results, especially when my electric bill is an average of $40 a month. I hope I will soon be able to hook up a solar panel system and be totally off the grid.
Movin- In
All that said, we moved in. We weren’t totally complete with the finish work but very functional, and I am impressed with the dome as a whole. Living here for 2 1/2 years, I have found it to be surprisingly quiet from the outside noise, energy efficient and very comfortable. Next spring I will treat the outside surface. I am not sure with what yet, but it’s been 5 years and it is starting to show signs that it needs to be covered.
I hope this helps potential Domers with some ideas and some hints of what the finished product will be like. I highly recommend the thin-shelled dome with all its attributes of weather resistance, energy efficiency, noise reduction and unique design. I believe the biggest obstacle is opening one’s mind to the concept of this unique construction. I firmly believe that the benefits far outweigh the obstacles. Just think outside of the box, or in my case, “Outside of the Circle.”

Come in, please! – A beautifully finished, wood-enhanced entry welcomes visitors to Cloudome. (Chuck Peters)
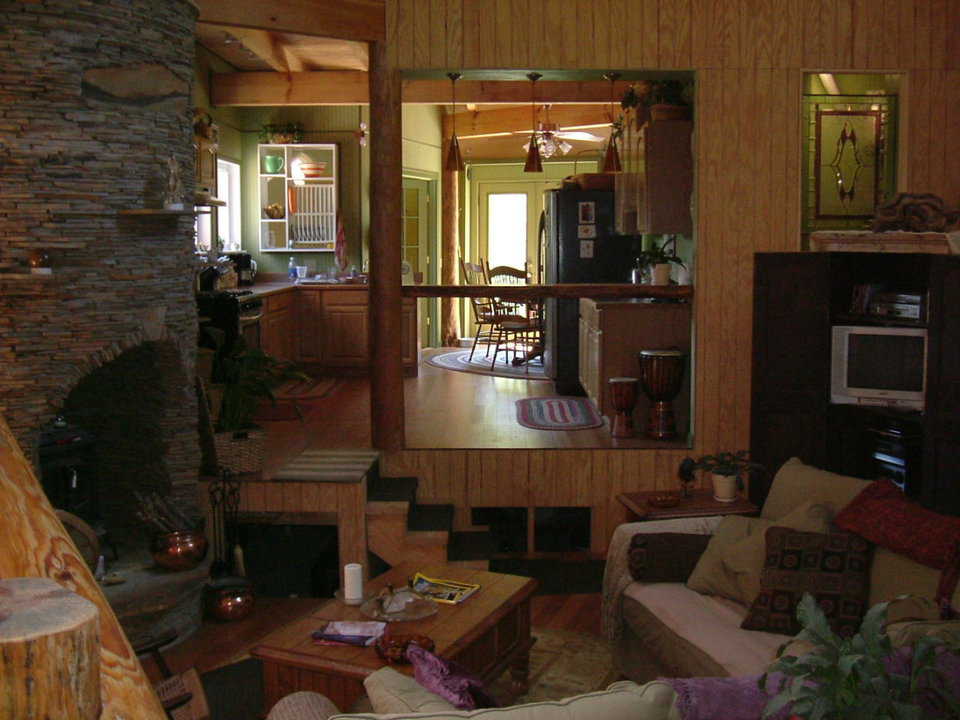
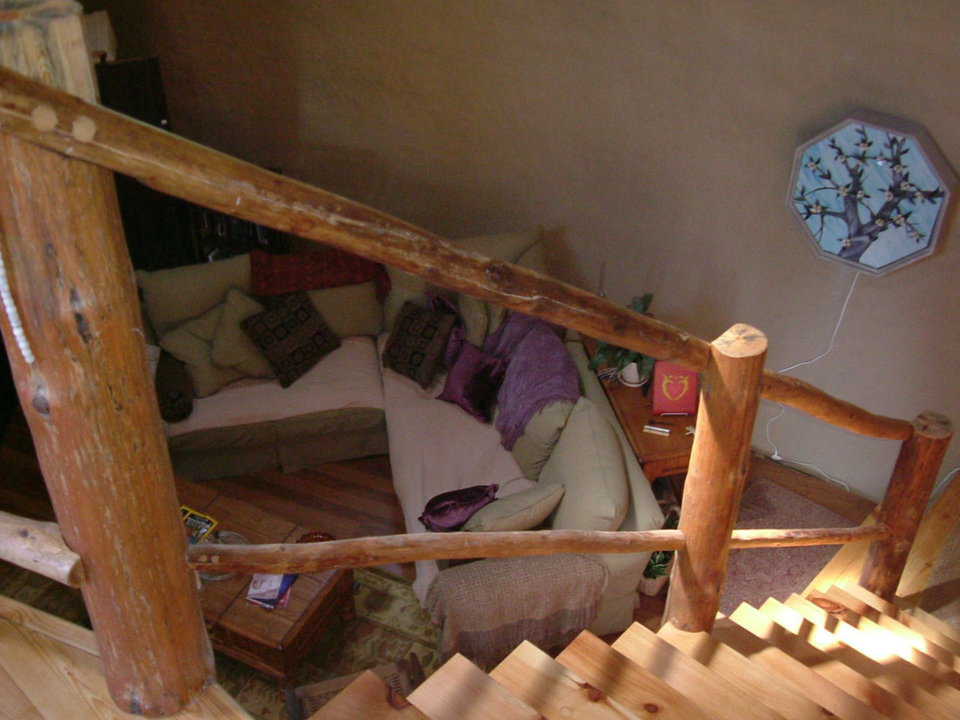
Gracious living – At Cloudome, Chuck, whose background is design, did all the interior and exterior planning and decor. (Chuck Peters)
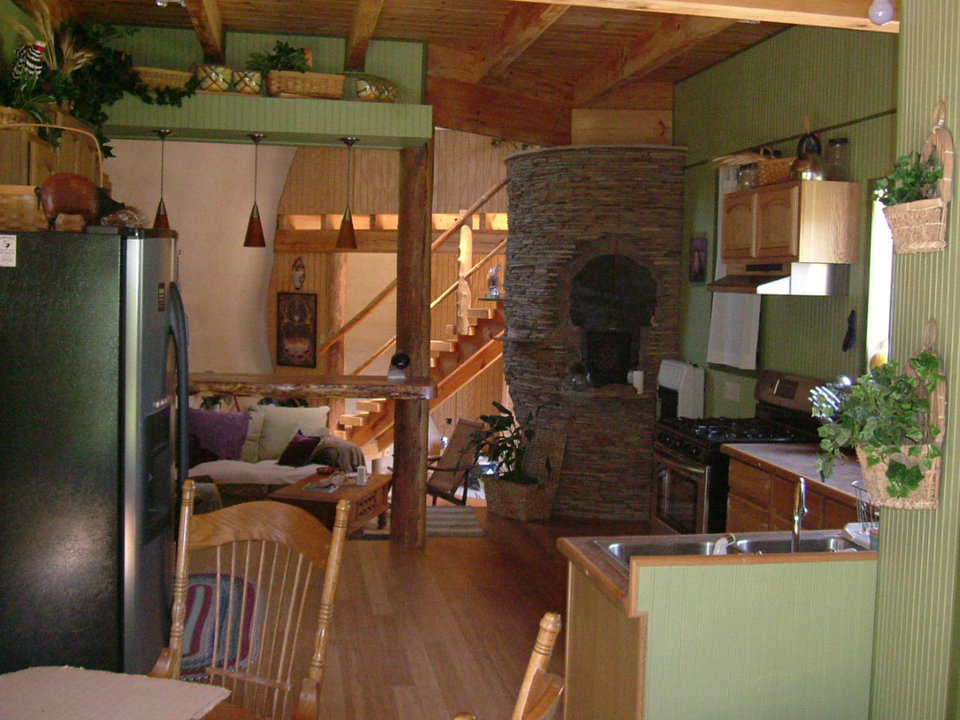
Cozy kitchen – It includes a small, wood-burning stove called a Yodel. Chuck uses it to heat the dome most of the winter. (Chuck Peters)
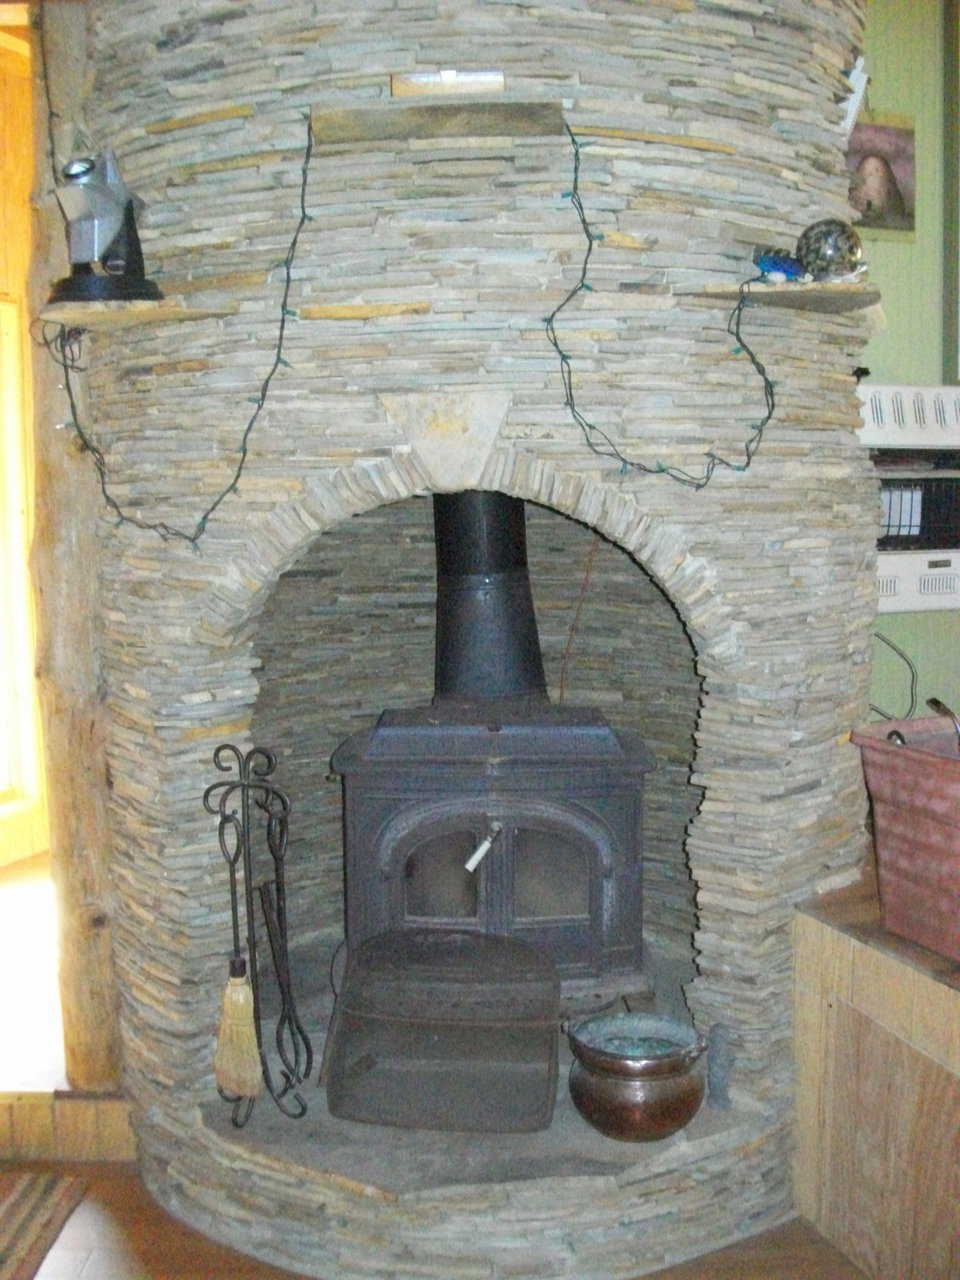
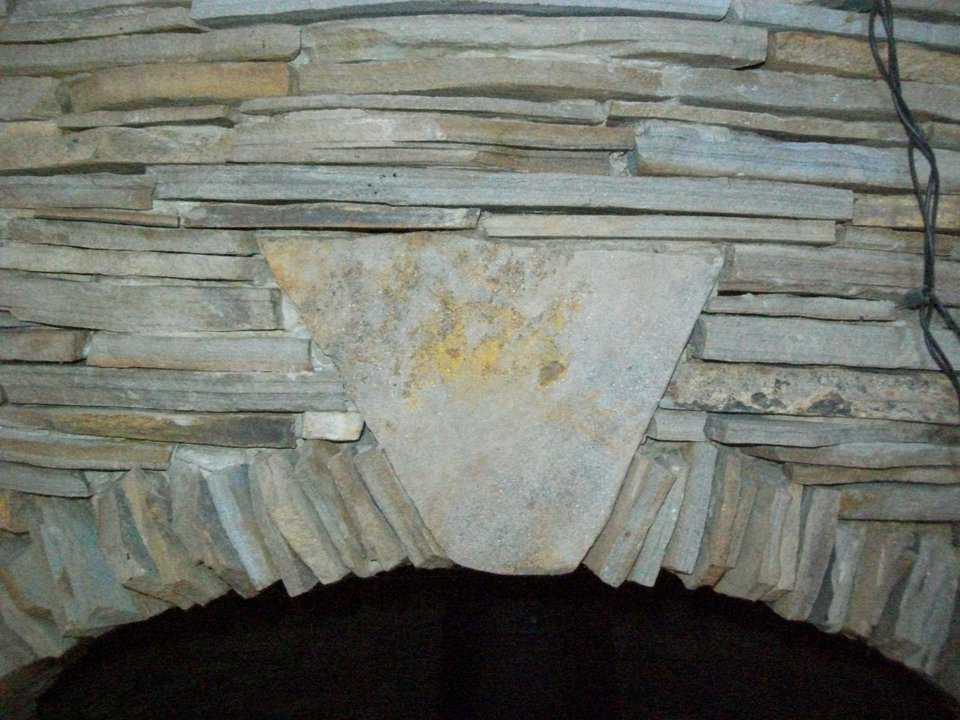
Fireplace – It’s based on a Russian design. Raised off the slab about 3 feet, the floor for the wood-burning stove is vented. (Chuck Peters)
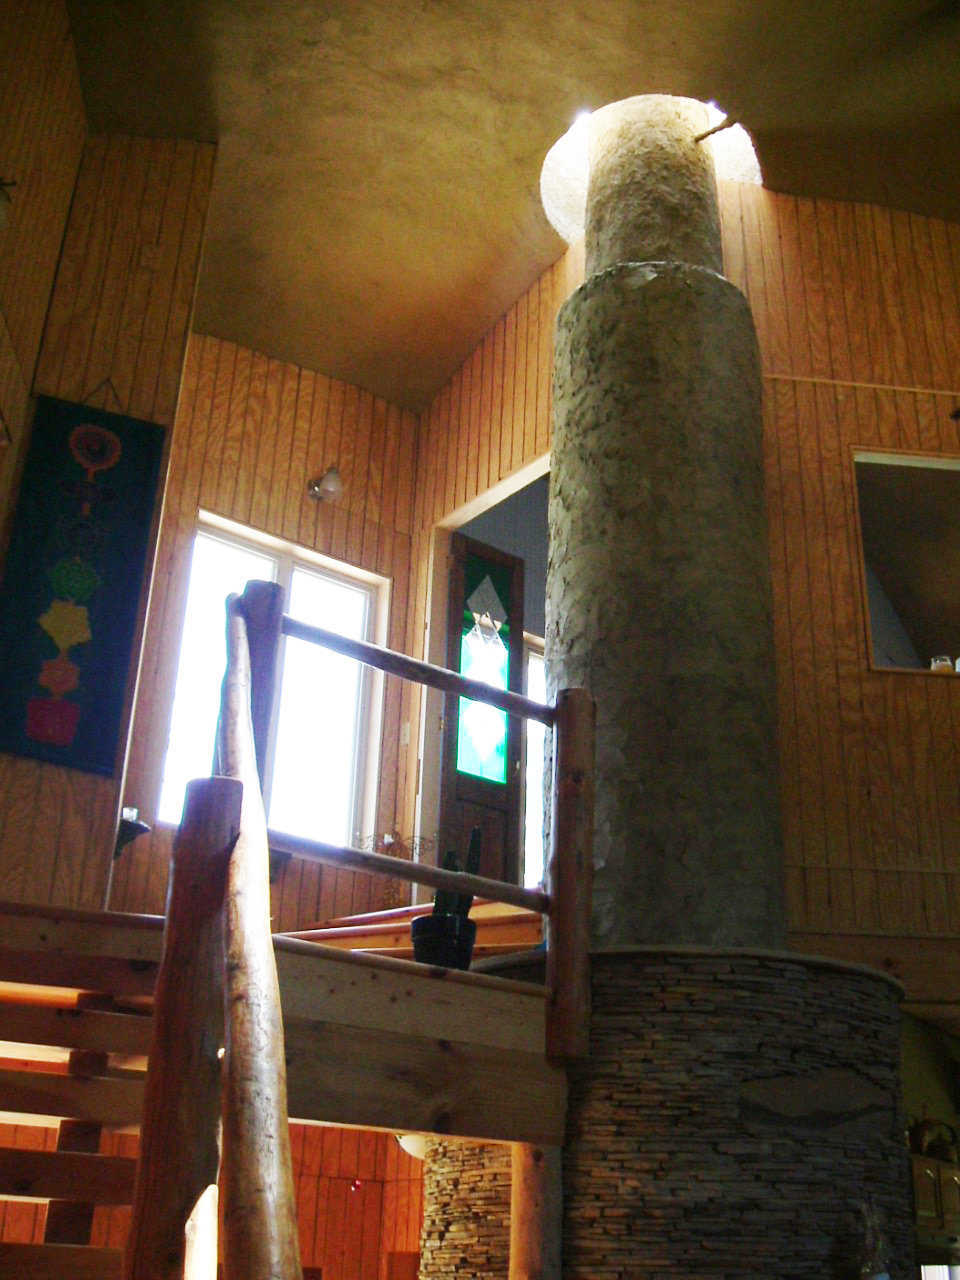
Chimney – In its design, Chuck included an opening above the Yodel for a ceramic oven. (Chuck Peters)
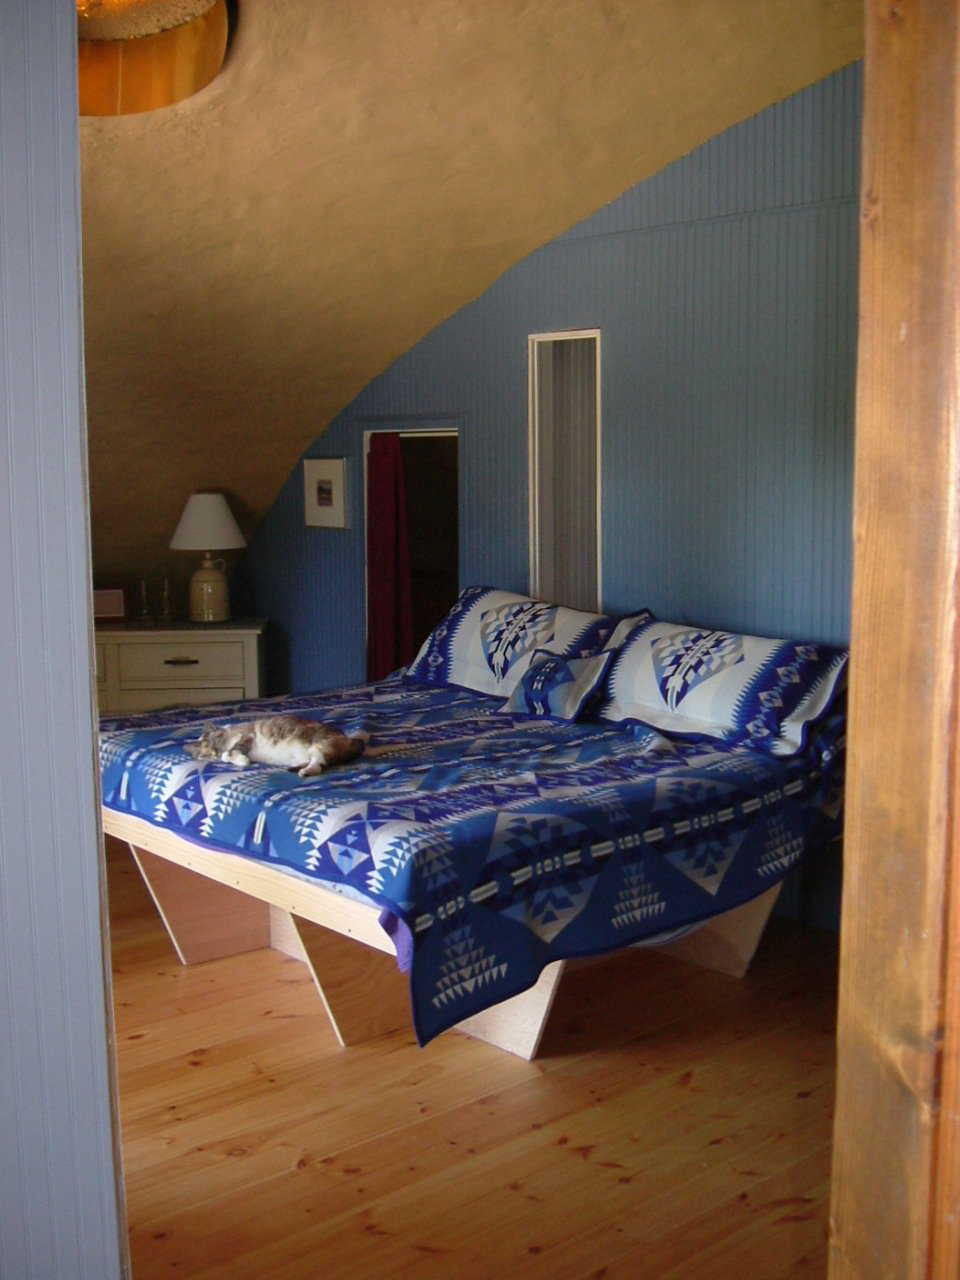
Master bedroom – After living in Cloudome for 2 1/2 years, Chuck is impressed with the dome as a whole. He finds it surprisingly quiet, energy efficient and very comfortable. (Chuck Peters)
Comfy – Chuck designed, contracted and did all the finish work himself. (Chuck Peters)
Beautiful and energy efficient – Cloudome, mainly heated with wood, has an electrical utilities bill of about $35/month. Suspecting that the meter was malfunctioning, the power company changed it several times. (Chuck Peters)